How to share 360 photos
.jpeg)
If you are looking for an easy way to upload and share individual 360 photos then look no further as TeliportMe provides seamless sharing capabilities to maximize reach and impact of your 360 photos.
This comprehensive tutorial will guide you through the process of sharing 360-degree photos, while also introducing you to an array of features and branding options.
Before we dive in let's learn a little bit about 360 photos .
What are 360 photos:
A 360-degree photo, also known as a 360 photo, 360 panorama or a 3D photo is a wide-angle view of a physical space. It's typically created by stitching together multiple images, although some cameras and devices can capture these images in one shot.
In a 360-degree photo, you can view the scene in any direction—not just the direction the camera was facing when the picture was taken. This is why it's called a "360-degree" photo: it covers 360 degrees of view.
Different kinds of 360 photos
360-degree photos come in different forms, primarily defined by the field of view they cover and the technology used to capture them.
Here are a few of the main types:
Monoscopic 360-Degree Photos: These are the most common type of 360-degree photos and are created by stitching together multiple photos or captured in one shot using a 360-degree camera. They give the viewer the ability to look around in all directions, but they do not provide depth perception (hence the term "monoscopic").
360-Degree Panoramas: These images only cover 360 degrees along one axis. This means it has a gap in the top and bottom. This is usually the panorama you capture with your native camera on your Apple or Android phone. They're often used in real estate or tourism to show a wide view of a scene or interior. These can be created by a 360-degree camera or by stitching together a series of photos taken from one spot.
Stereoscopic 360-Degree Photos: These images are captured in a way that provides a different image for each eye, creating a sense of depth and making the viewing experience more immersive. They require more advanced technology to capture and to view, as viewers typically need a virtual reality (VR) headset to see the 3D effect.
3D 360-Degree Photos: These are a subcategory of stereoscopic photos where the image not only provides a 360-degree view but also includes depth information. This allows viewers to get a sense of the relative distances of objects in the photo, making the experience even more immersive.
The type of 360-degree photo used depends on the needs of the project, the equipment available, and the desired viewer experience. For example, a simple 360-degree panorama might be sufficient for a real estate listing, while a fully immersive, stereoscopic 360-degree photo might be used for a high-end virtual reality game or simulation.
To share your 360-degree panoramas, follow these simple steps:
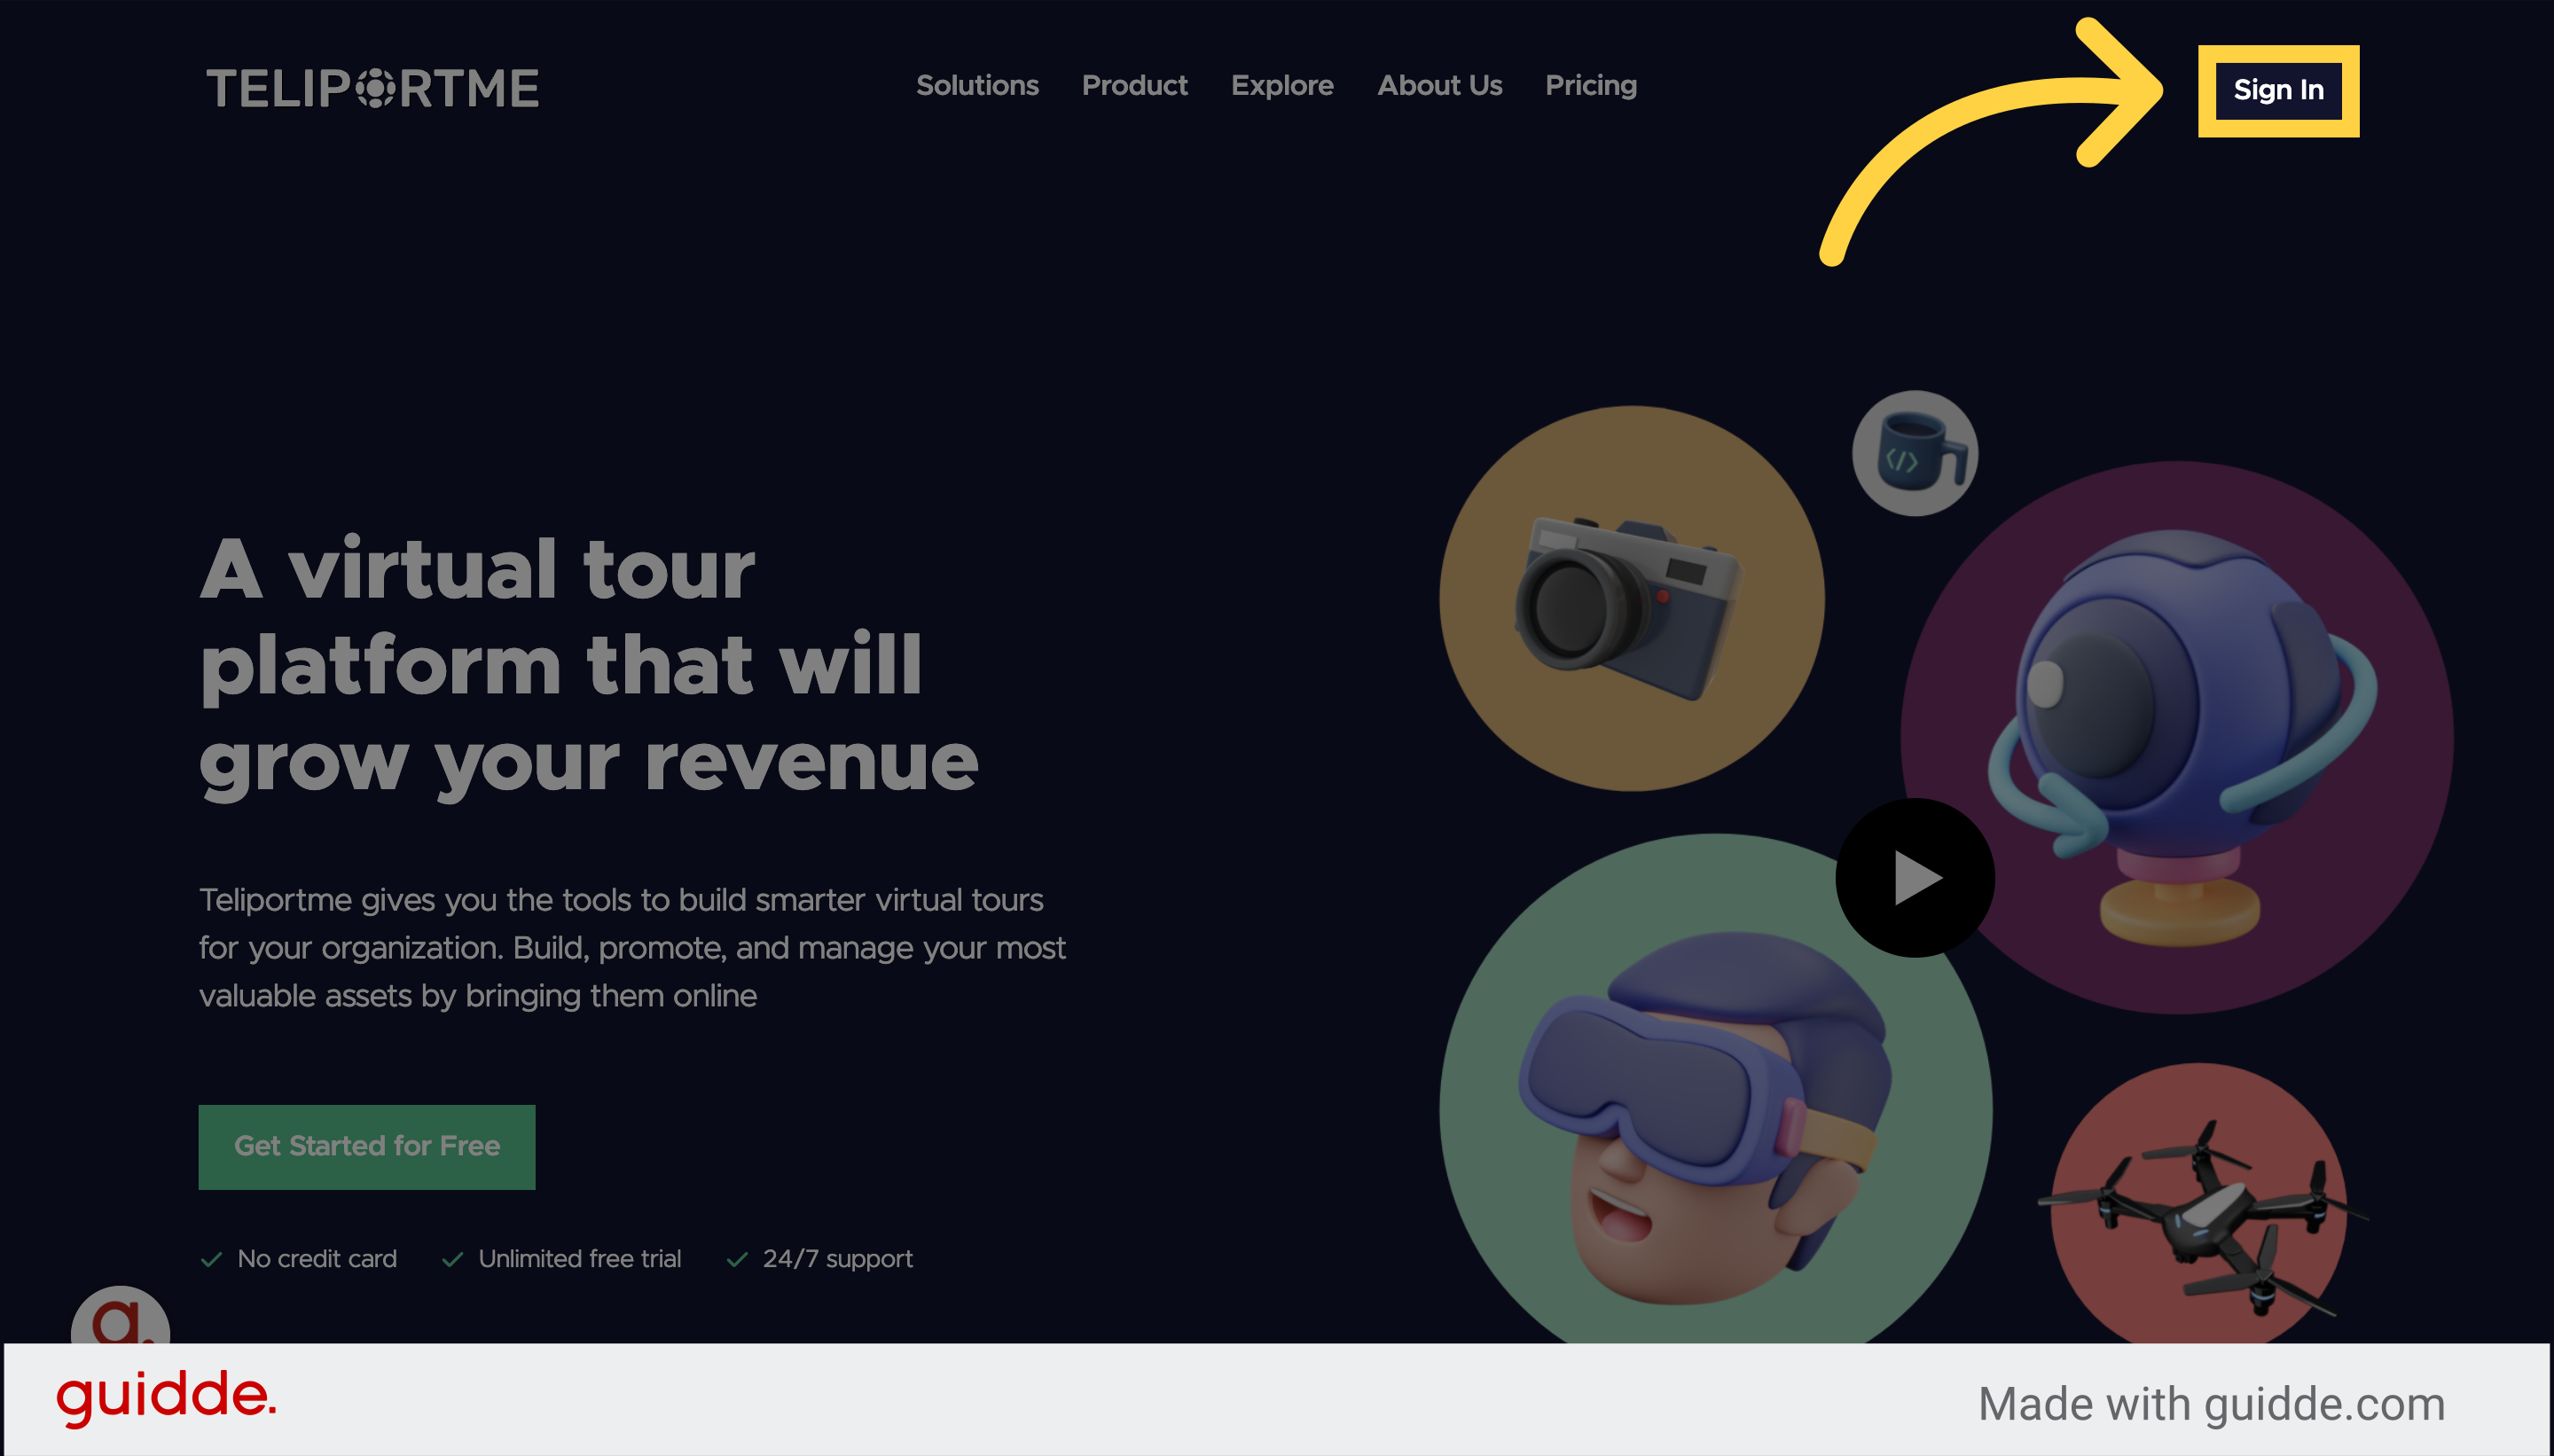
1. Navigate to TeliportMe.com and click "Sign In"
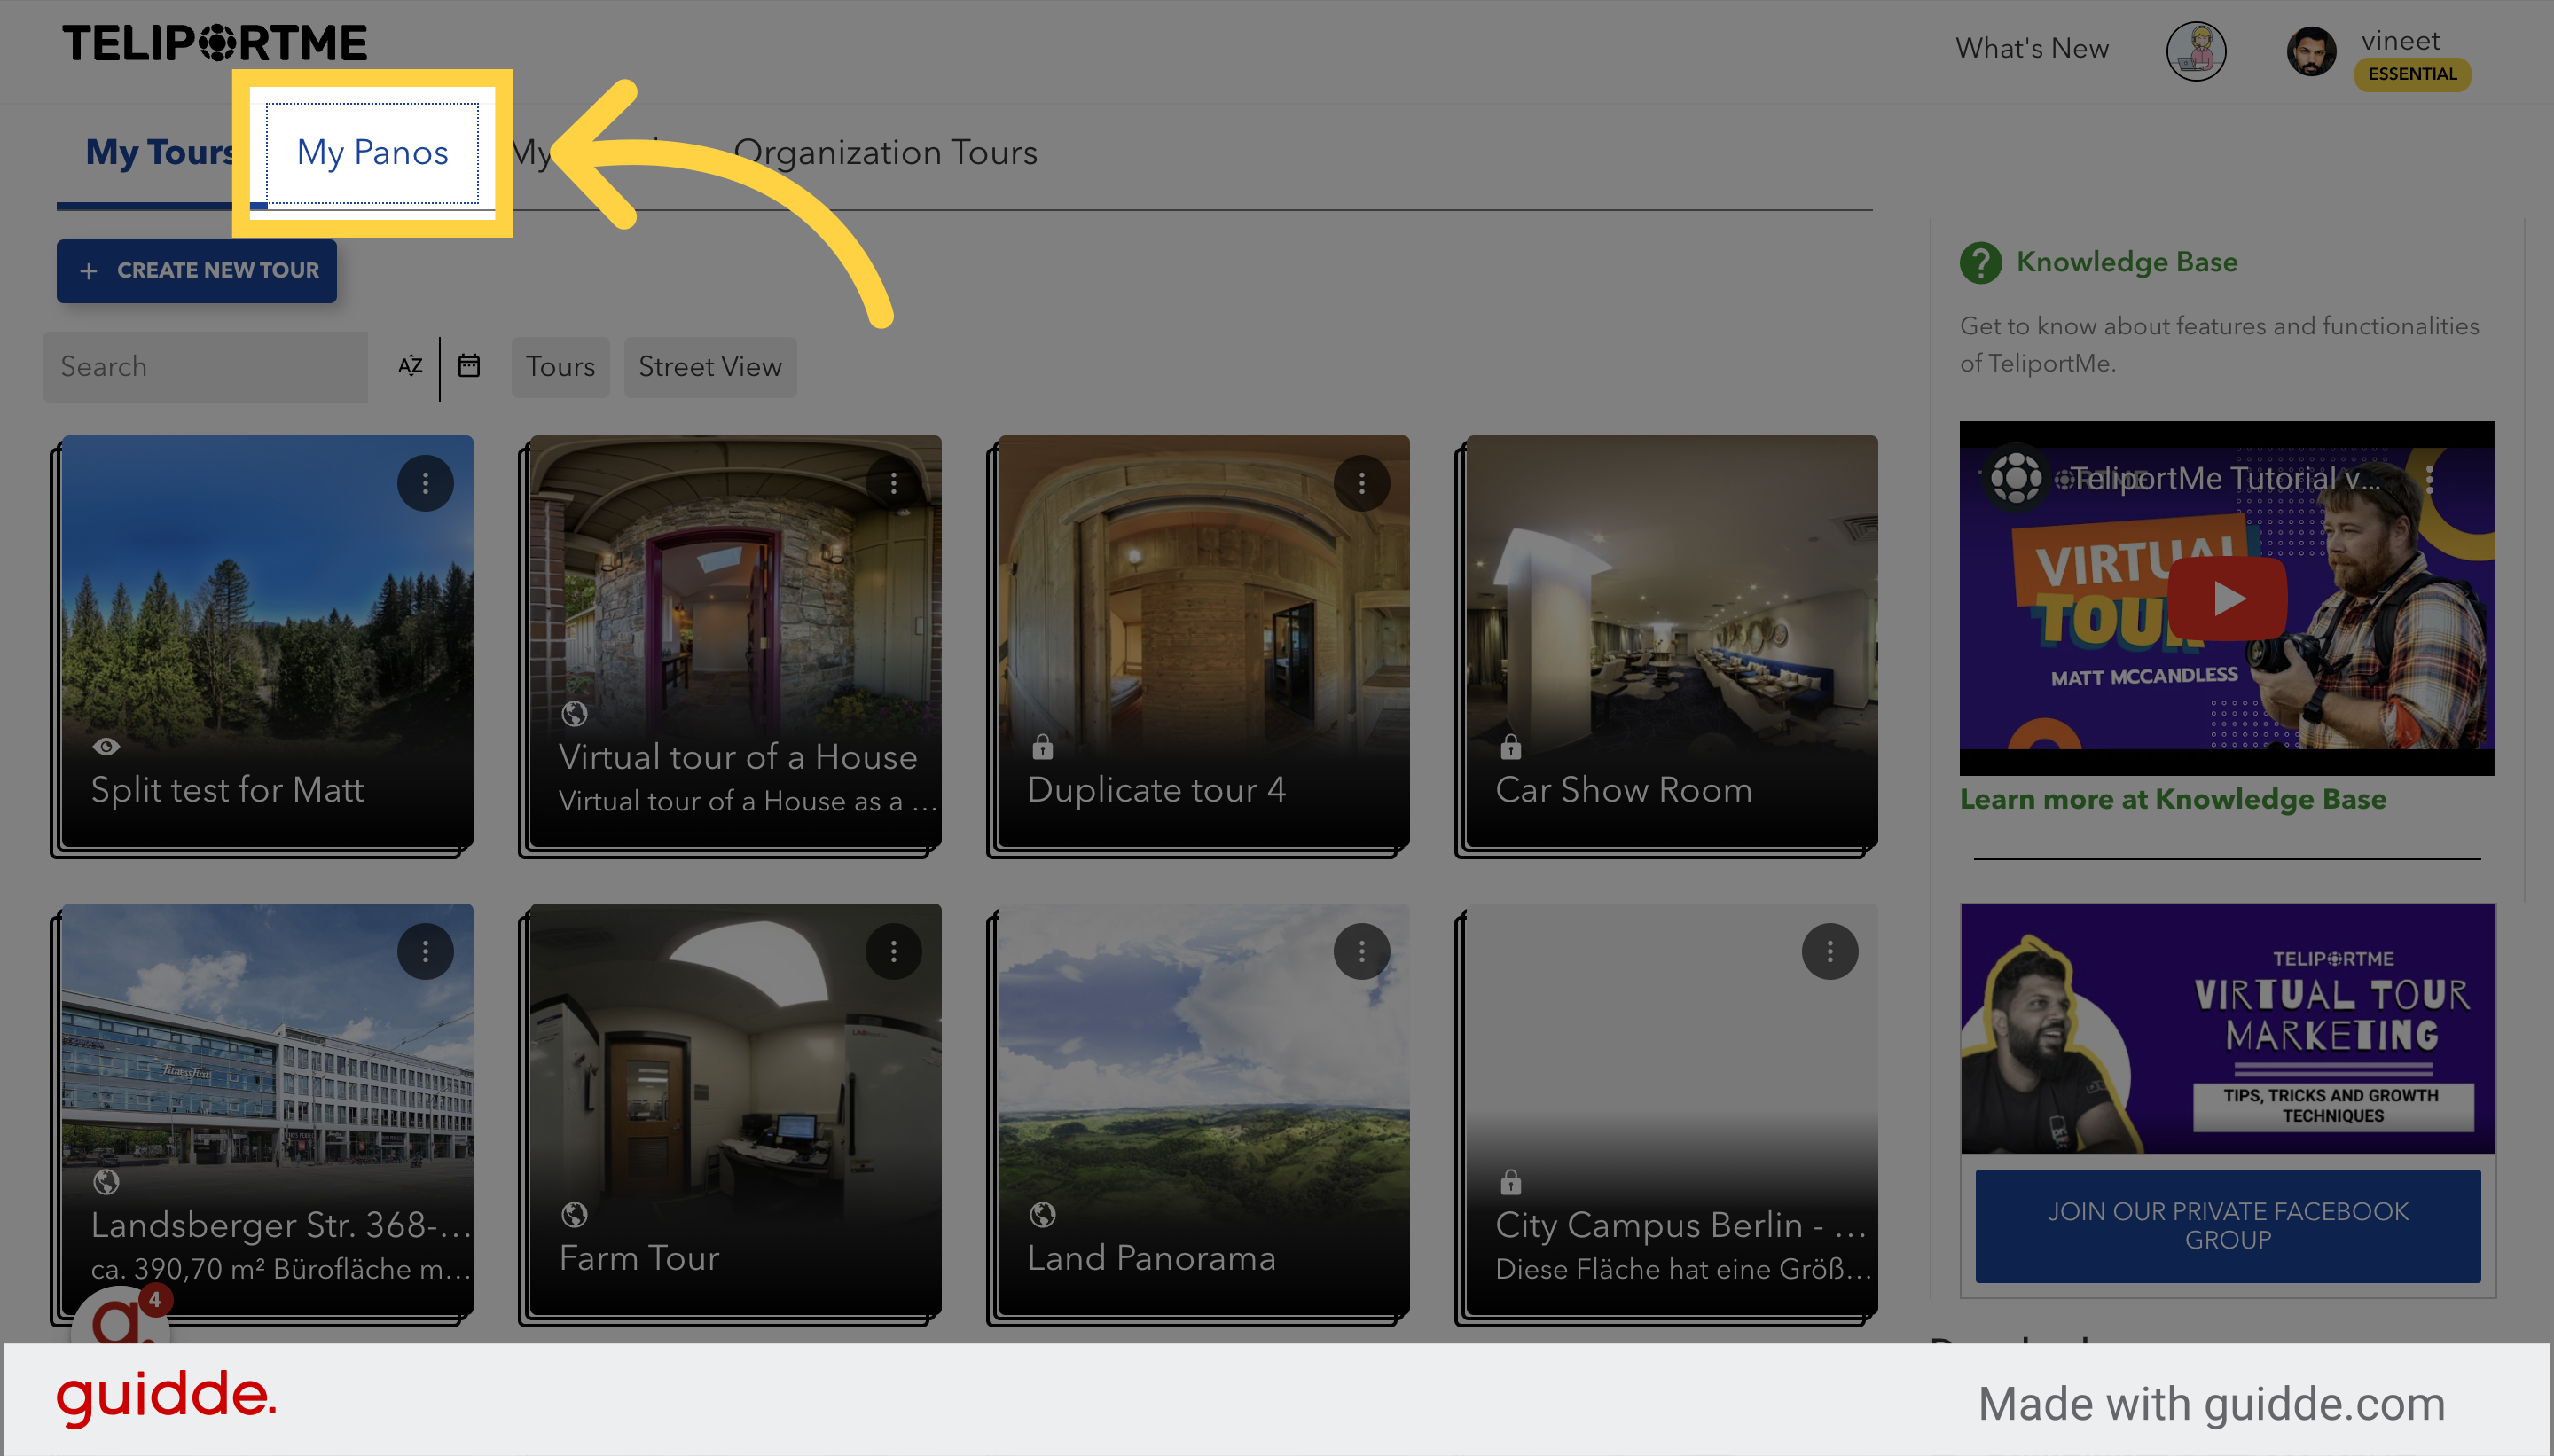
2. On your dashboard, click the "My Panos" tab.
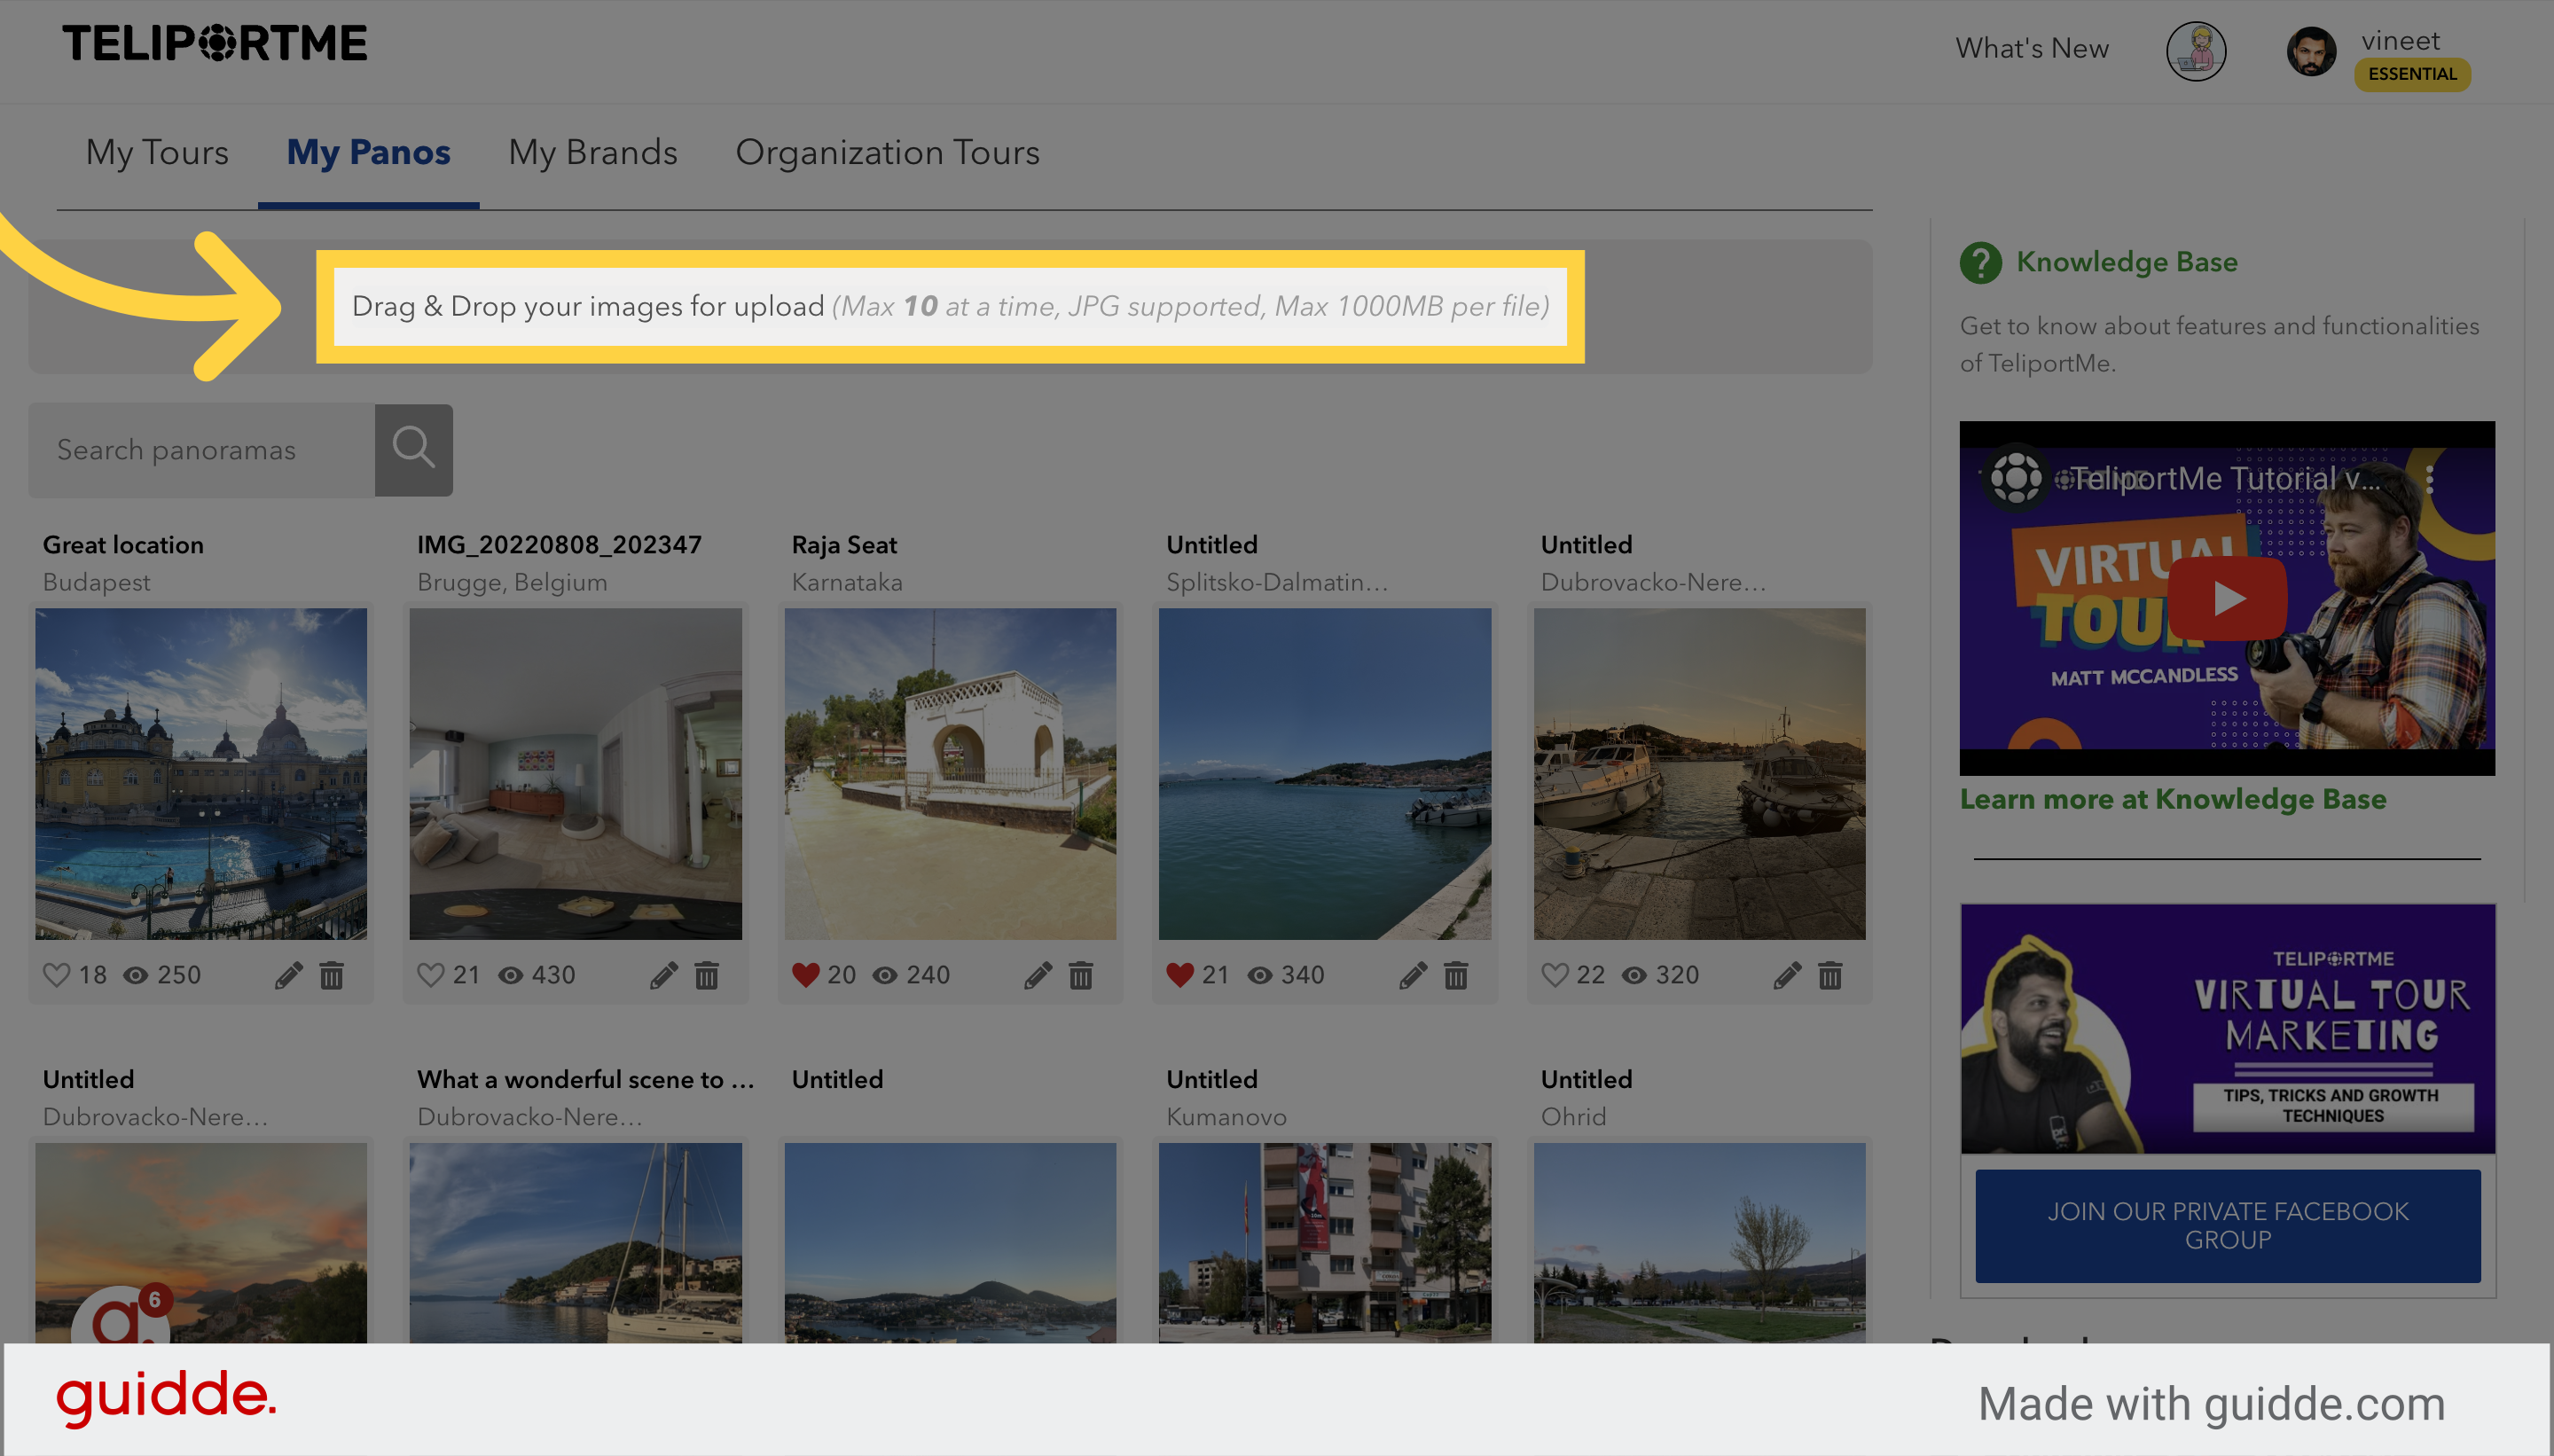
3. Click "Drag & Drop your images for upload"
You can upload a maximum of 10 at a time (JPG supported): Up to 30MB/file for a free account OR 100MB/file for a paid account)
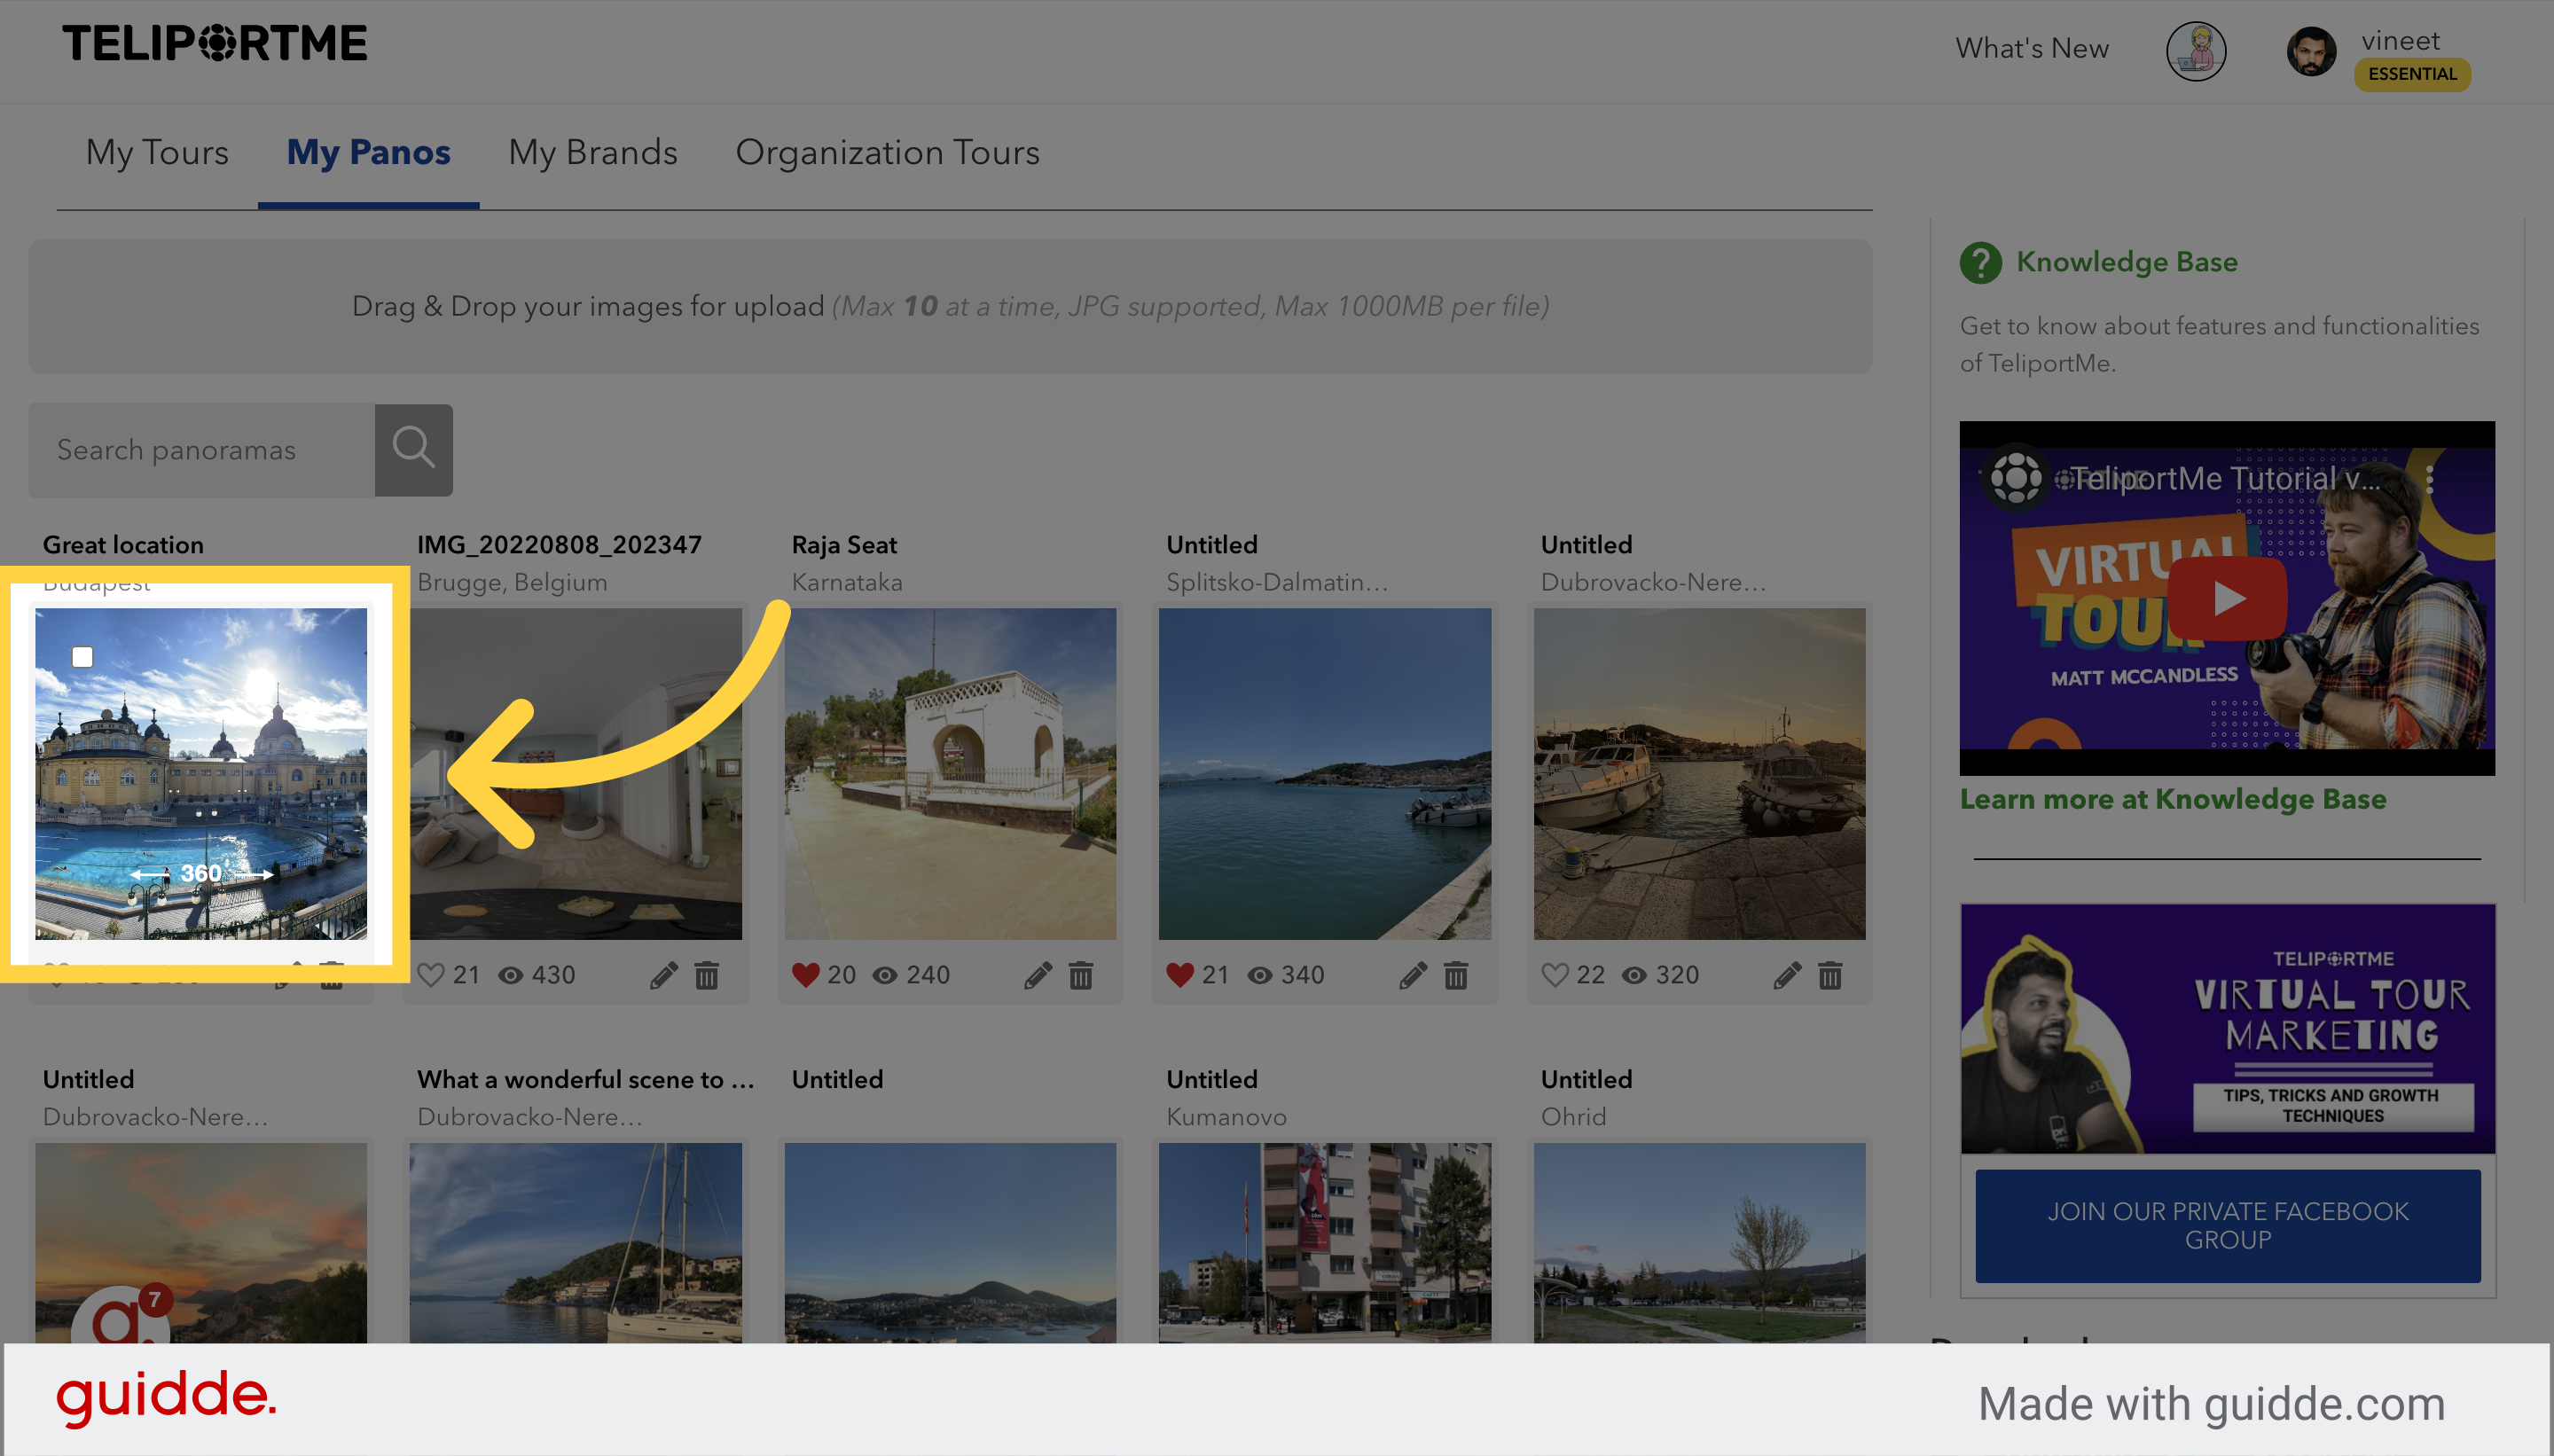
4. Click on the pano you want to share.
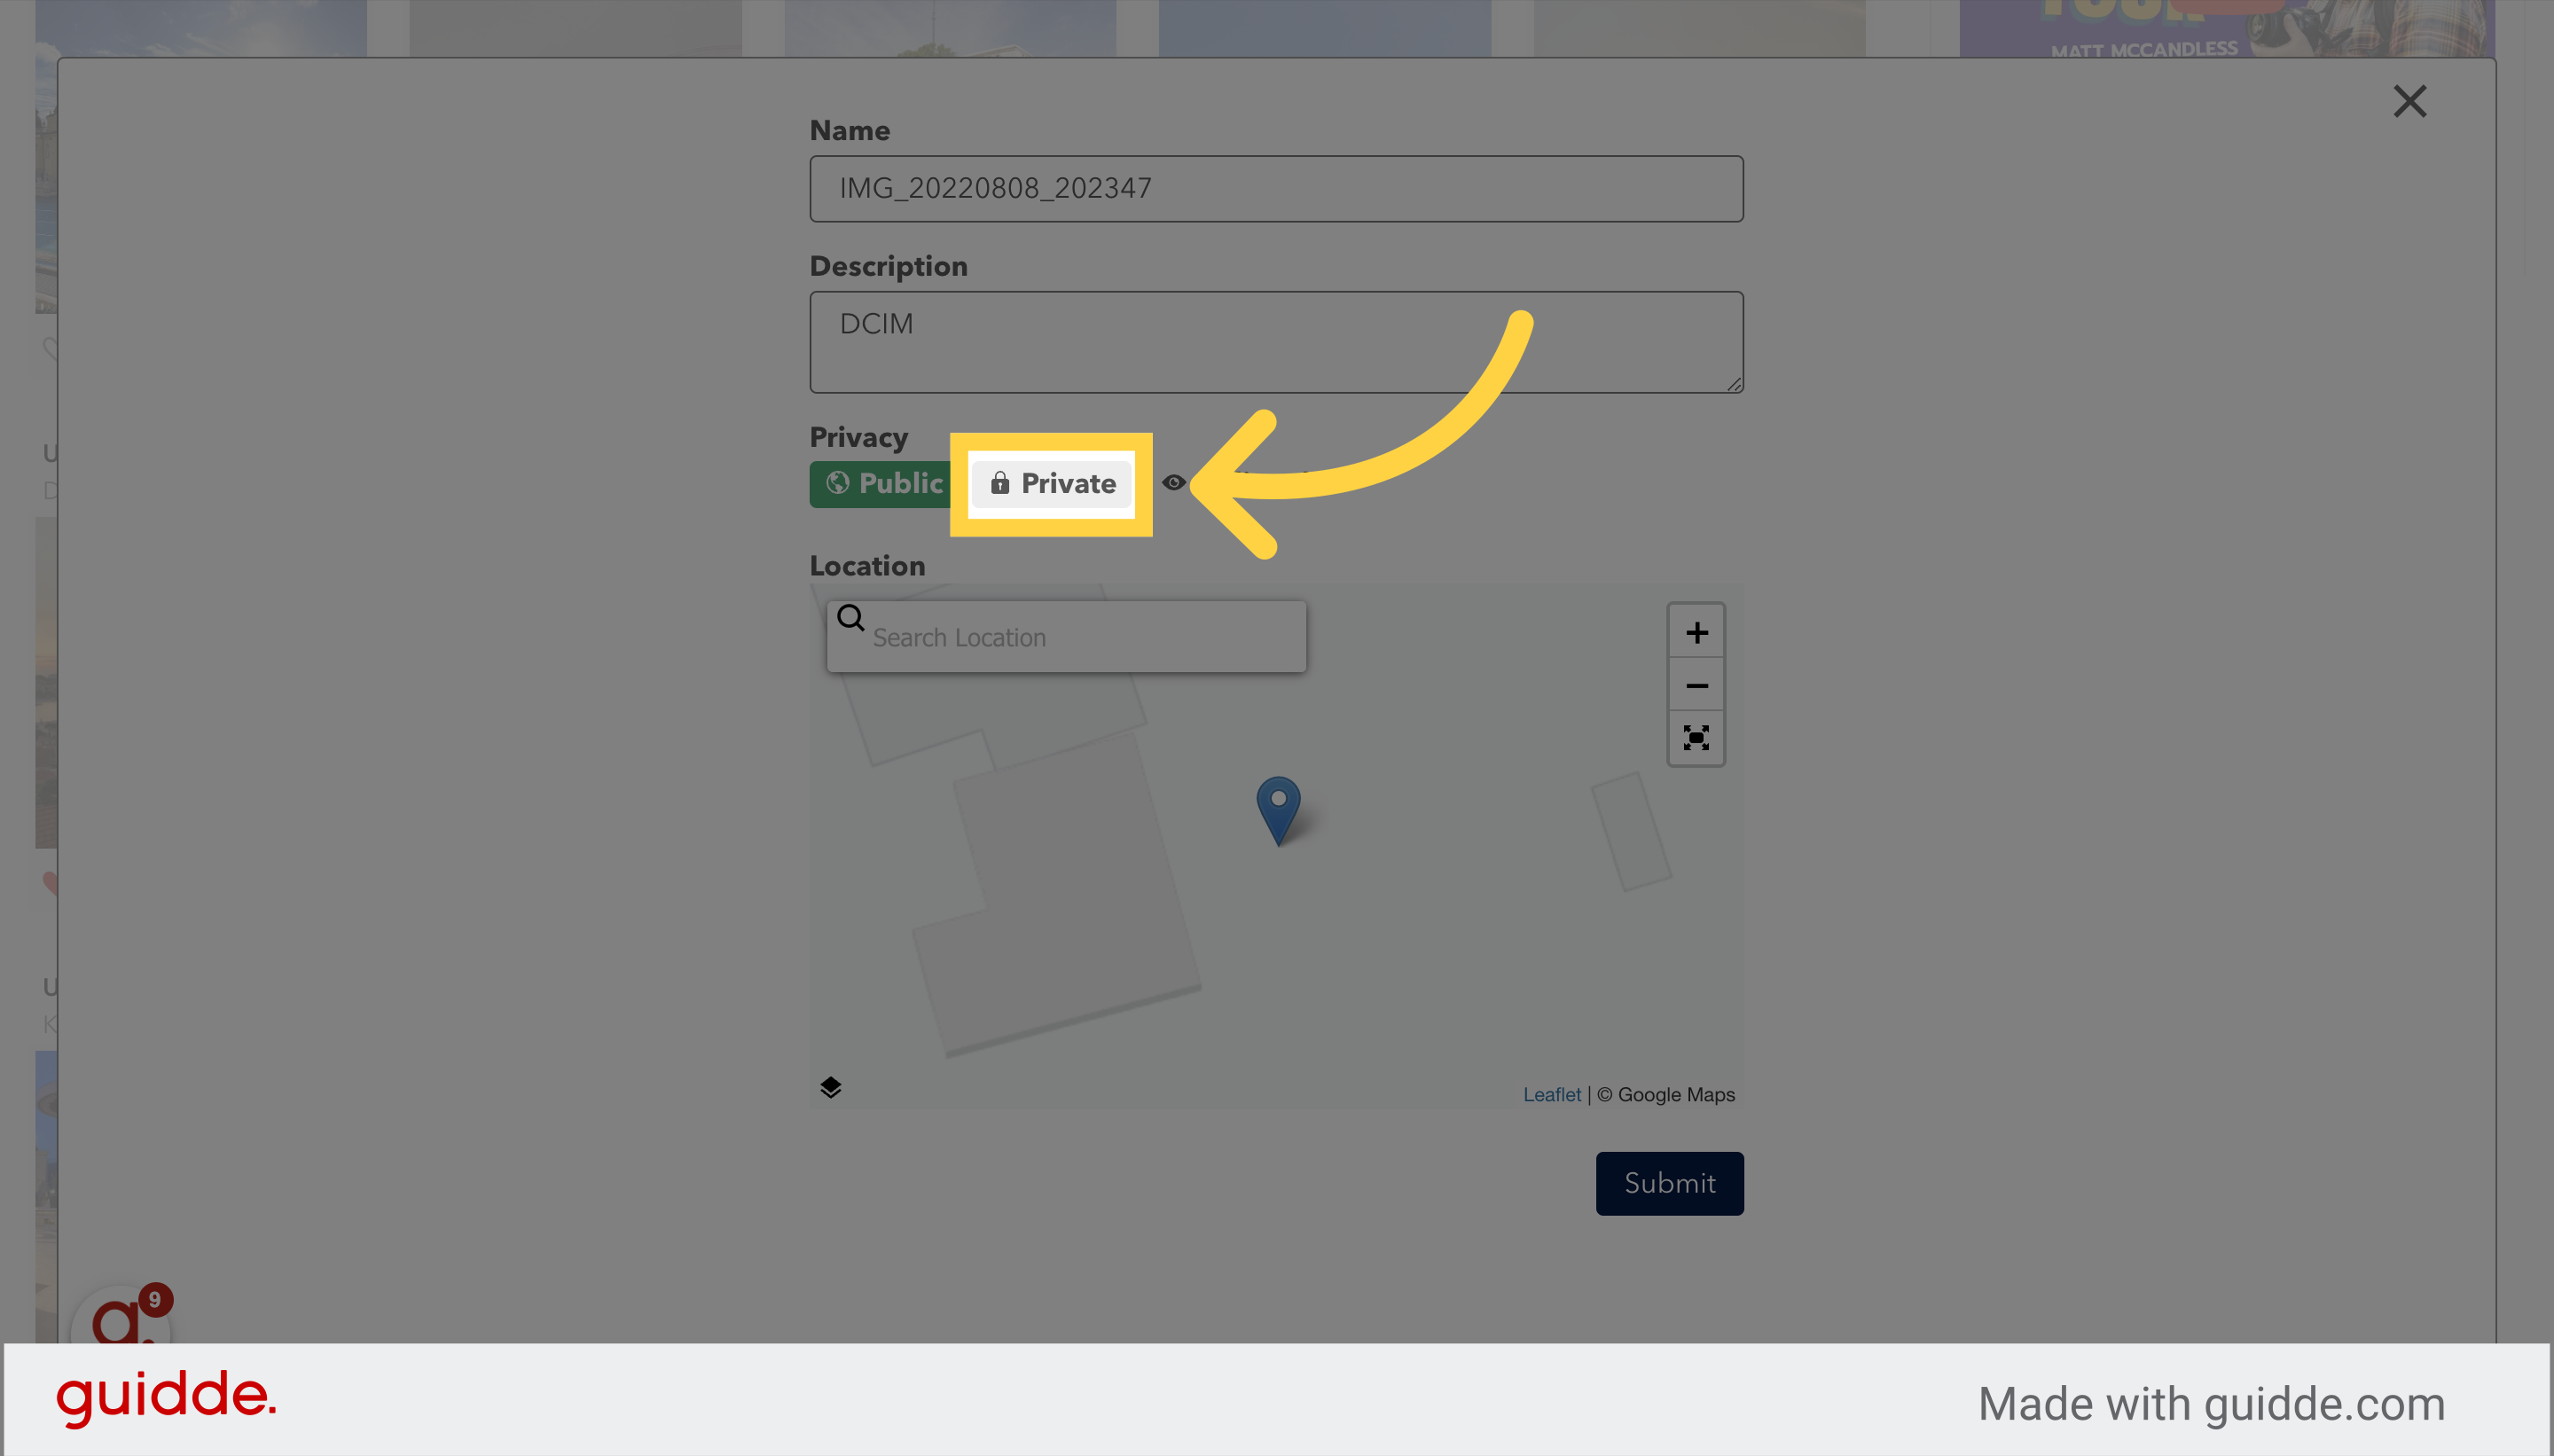
5. If you want to change the file name, privacy settings, or add a description, click the edit icon.

6. If you choose "Private," only those with access will be able to view the panorama.
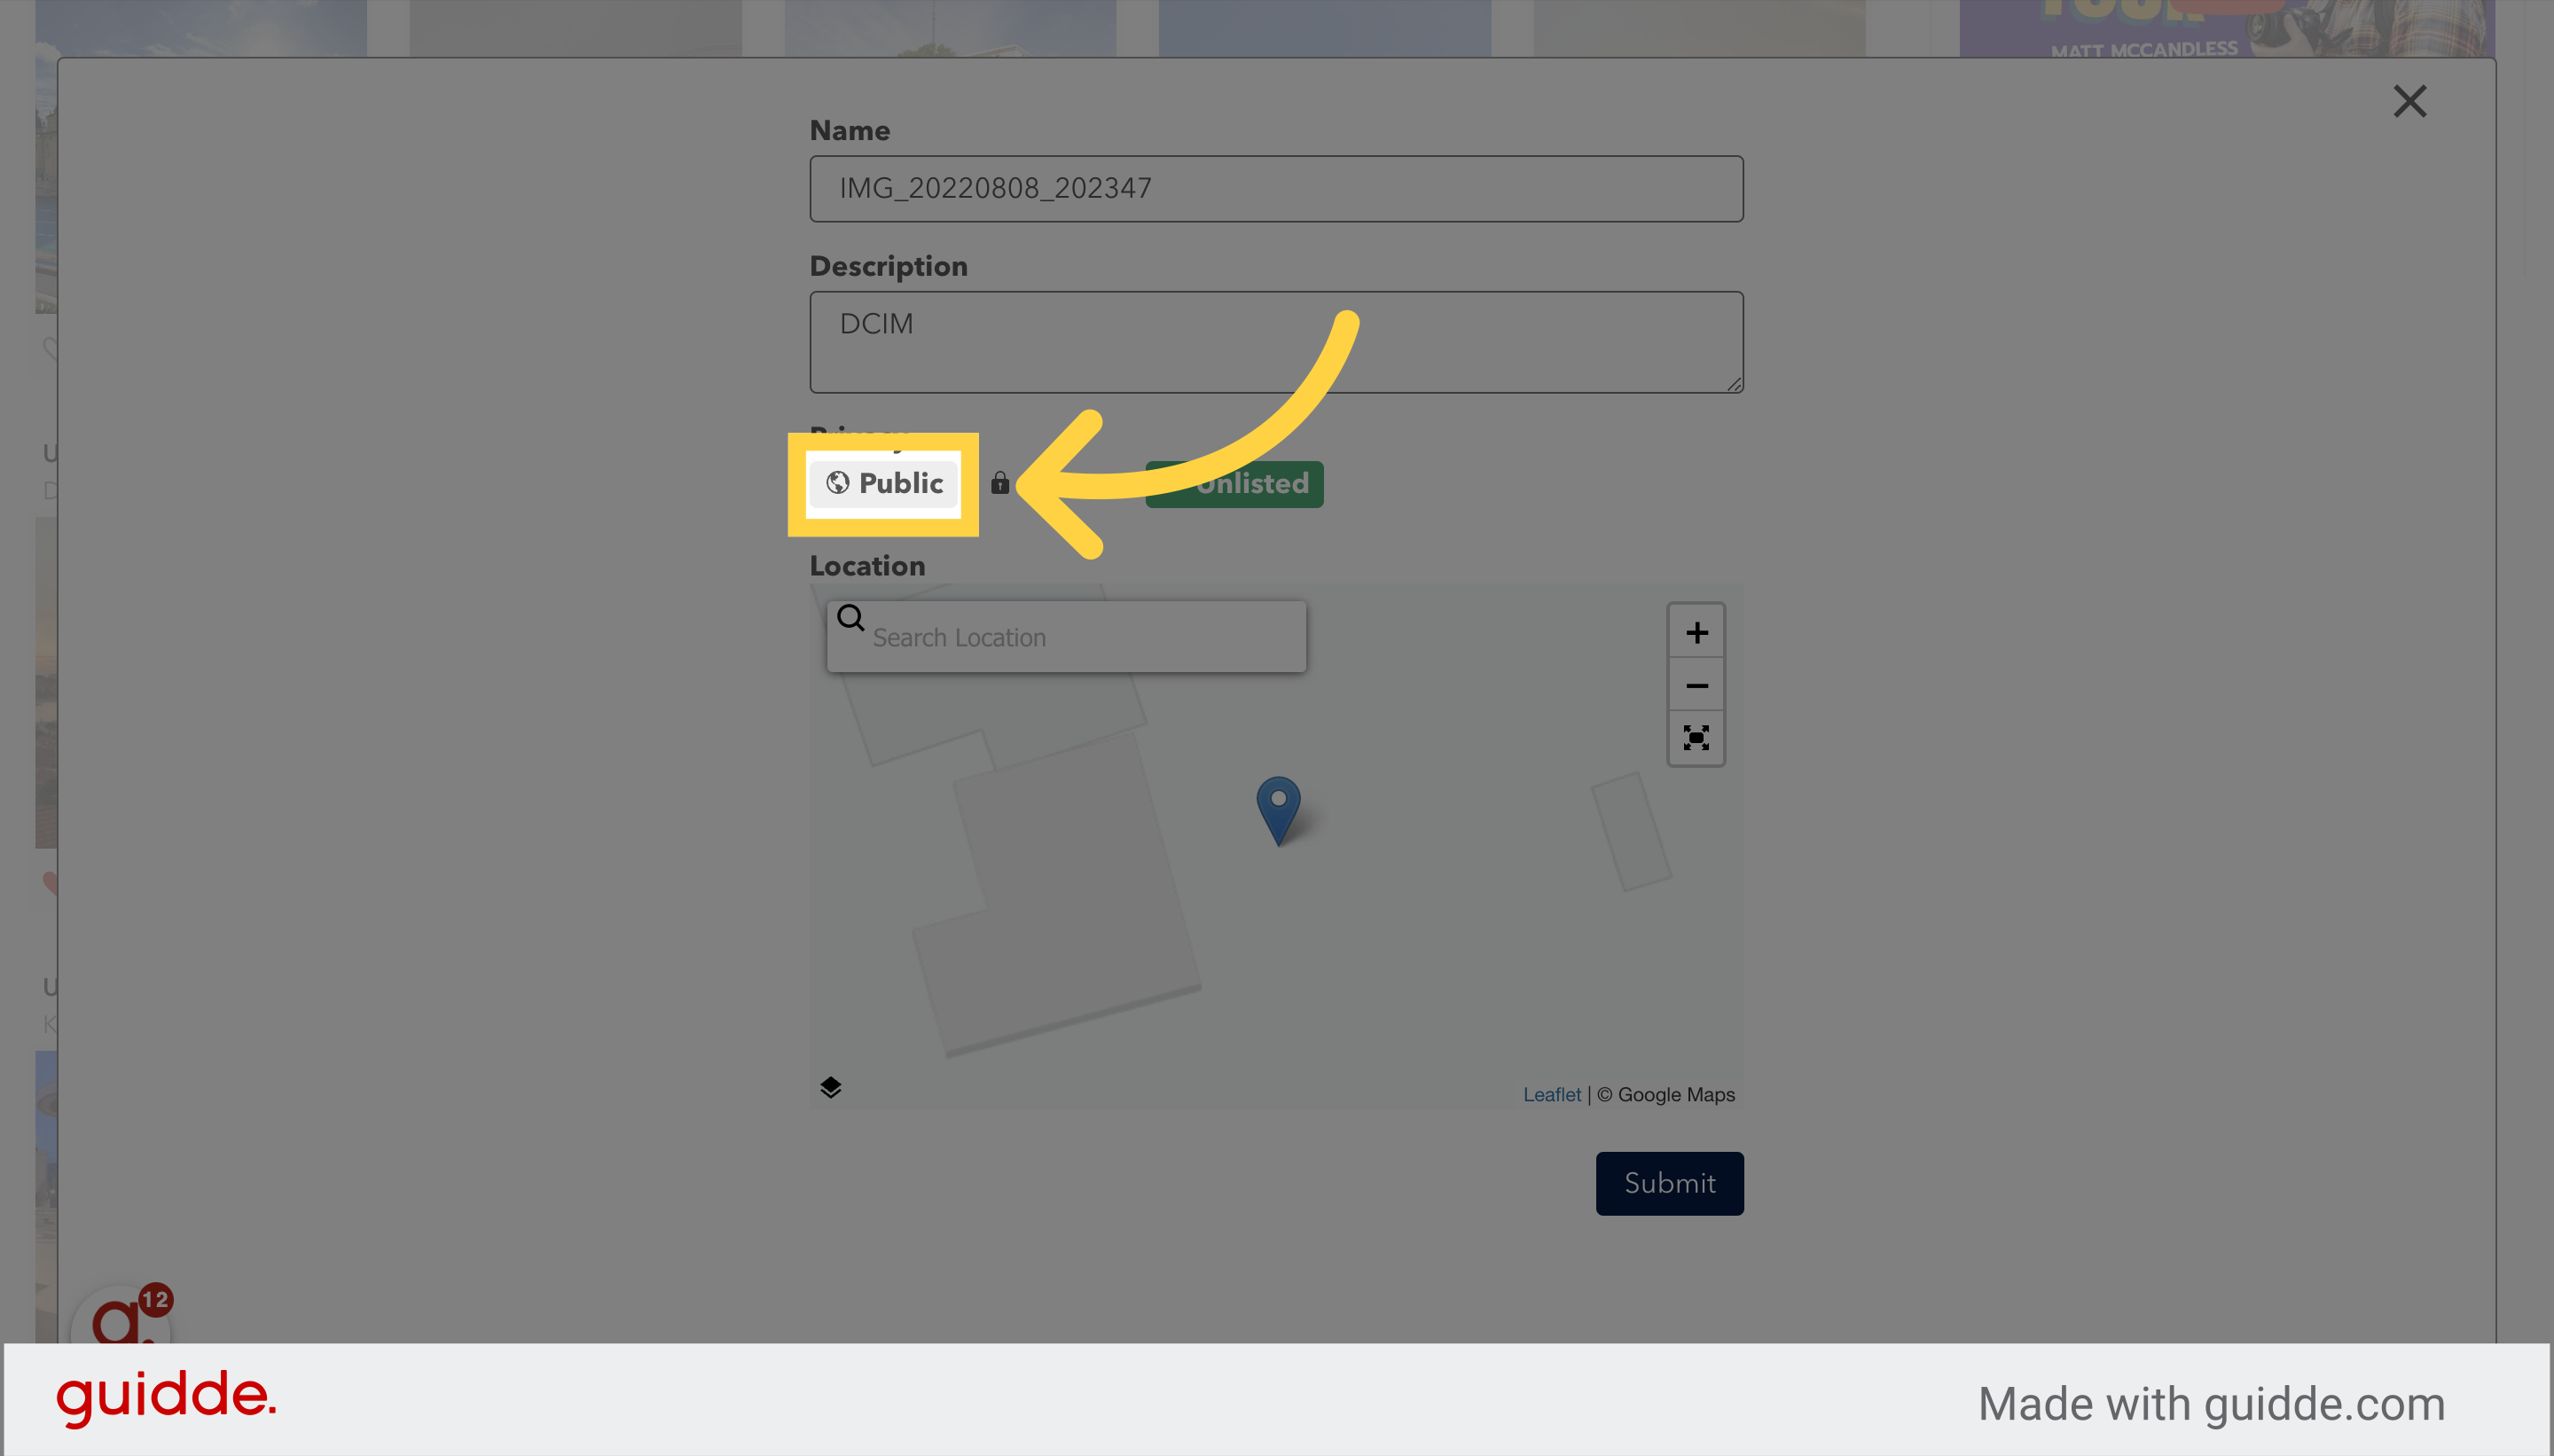
7. If you choose "Unlisted," the panorama will only be visible if you have a link.

8. If you choose "Public," the panorama will appear on your public profile.
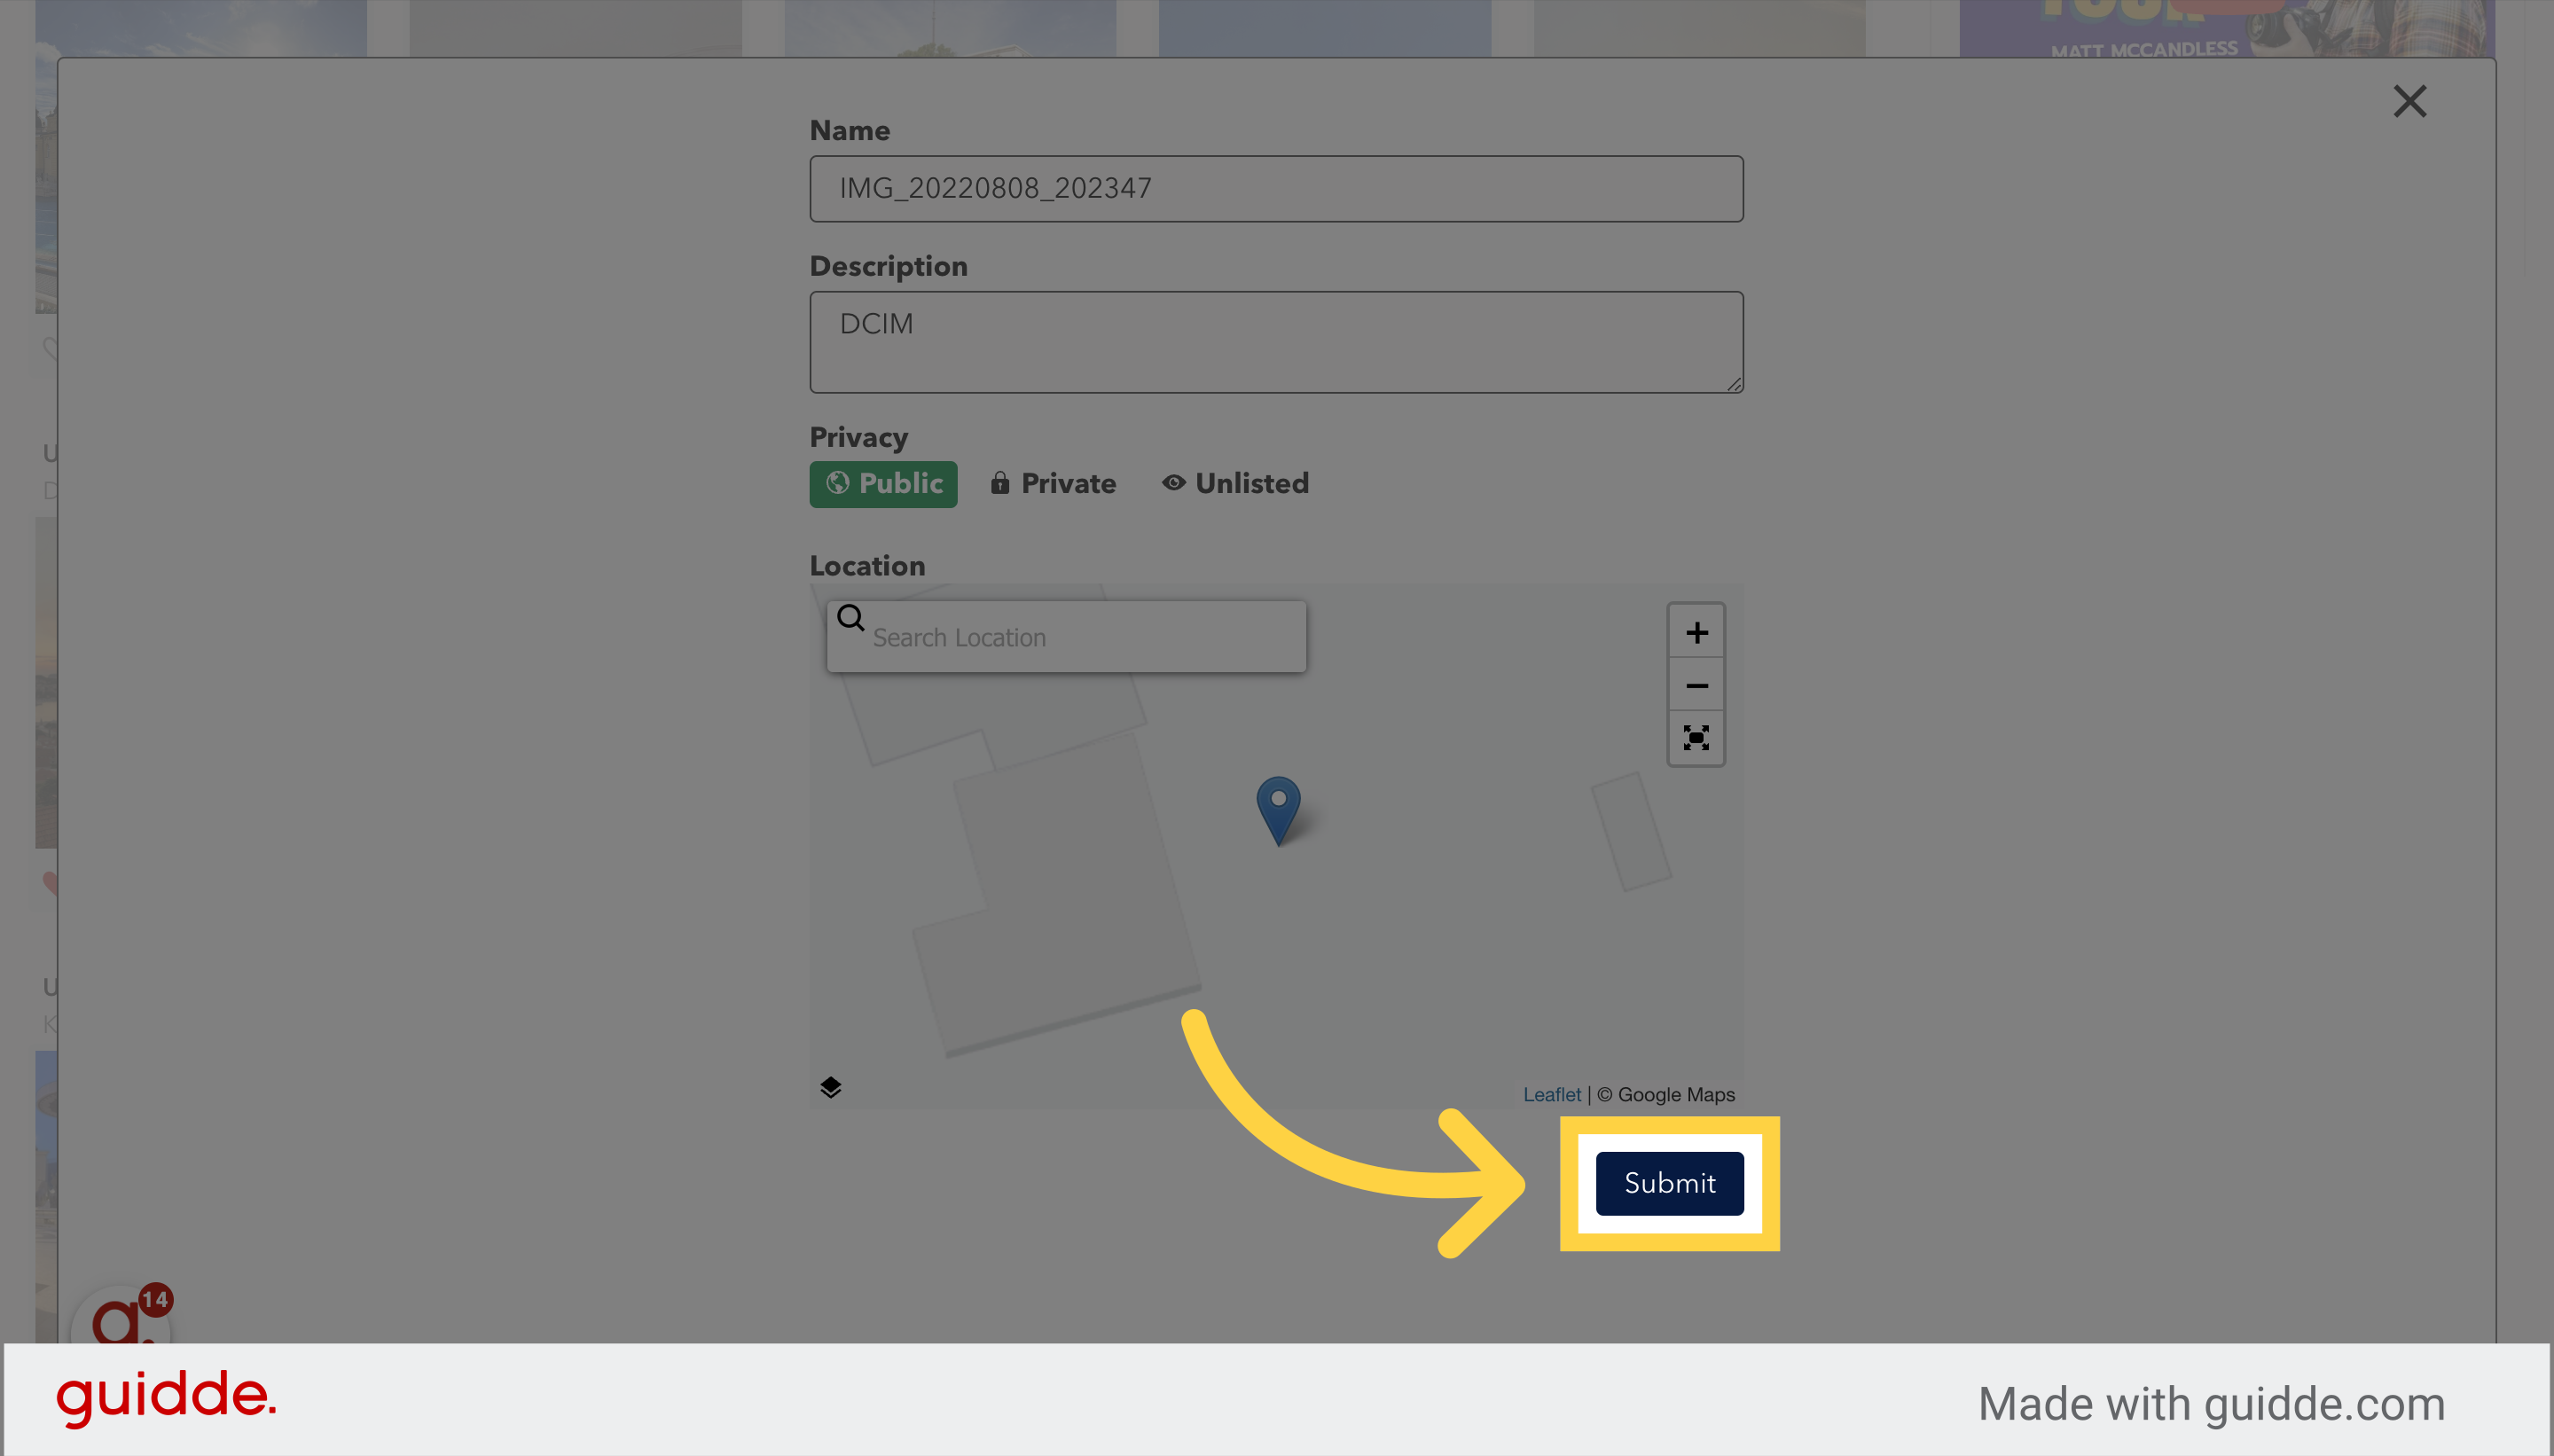
9. Click "Submit" to save.
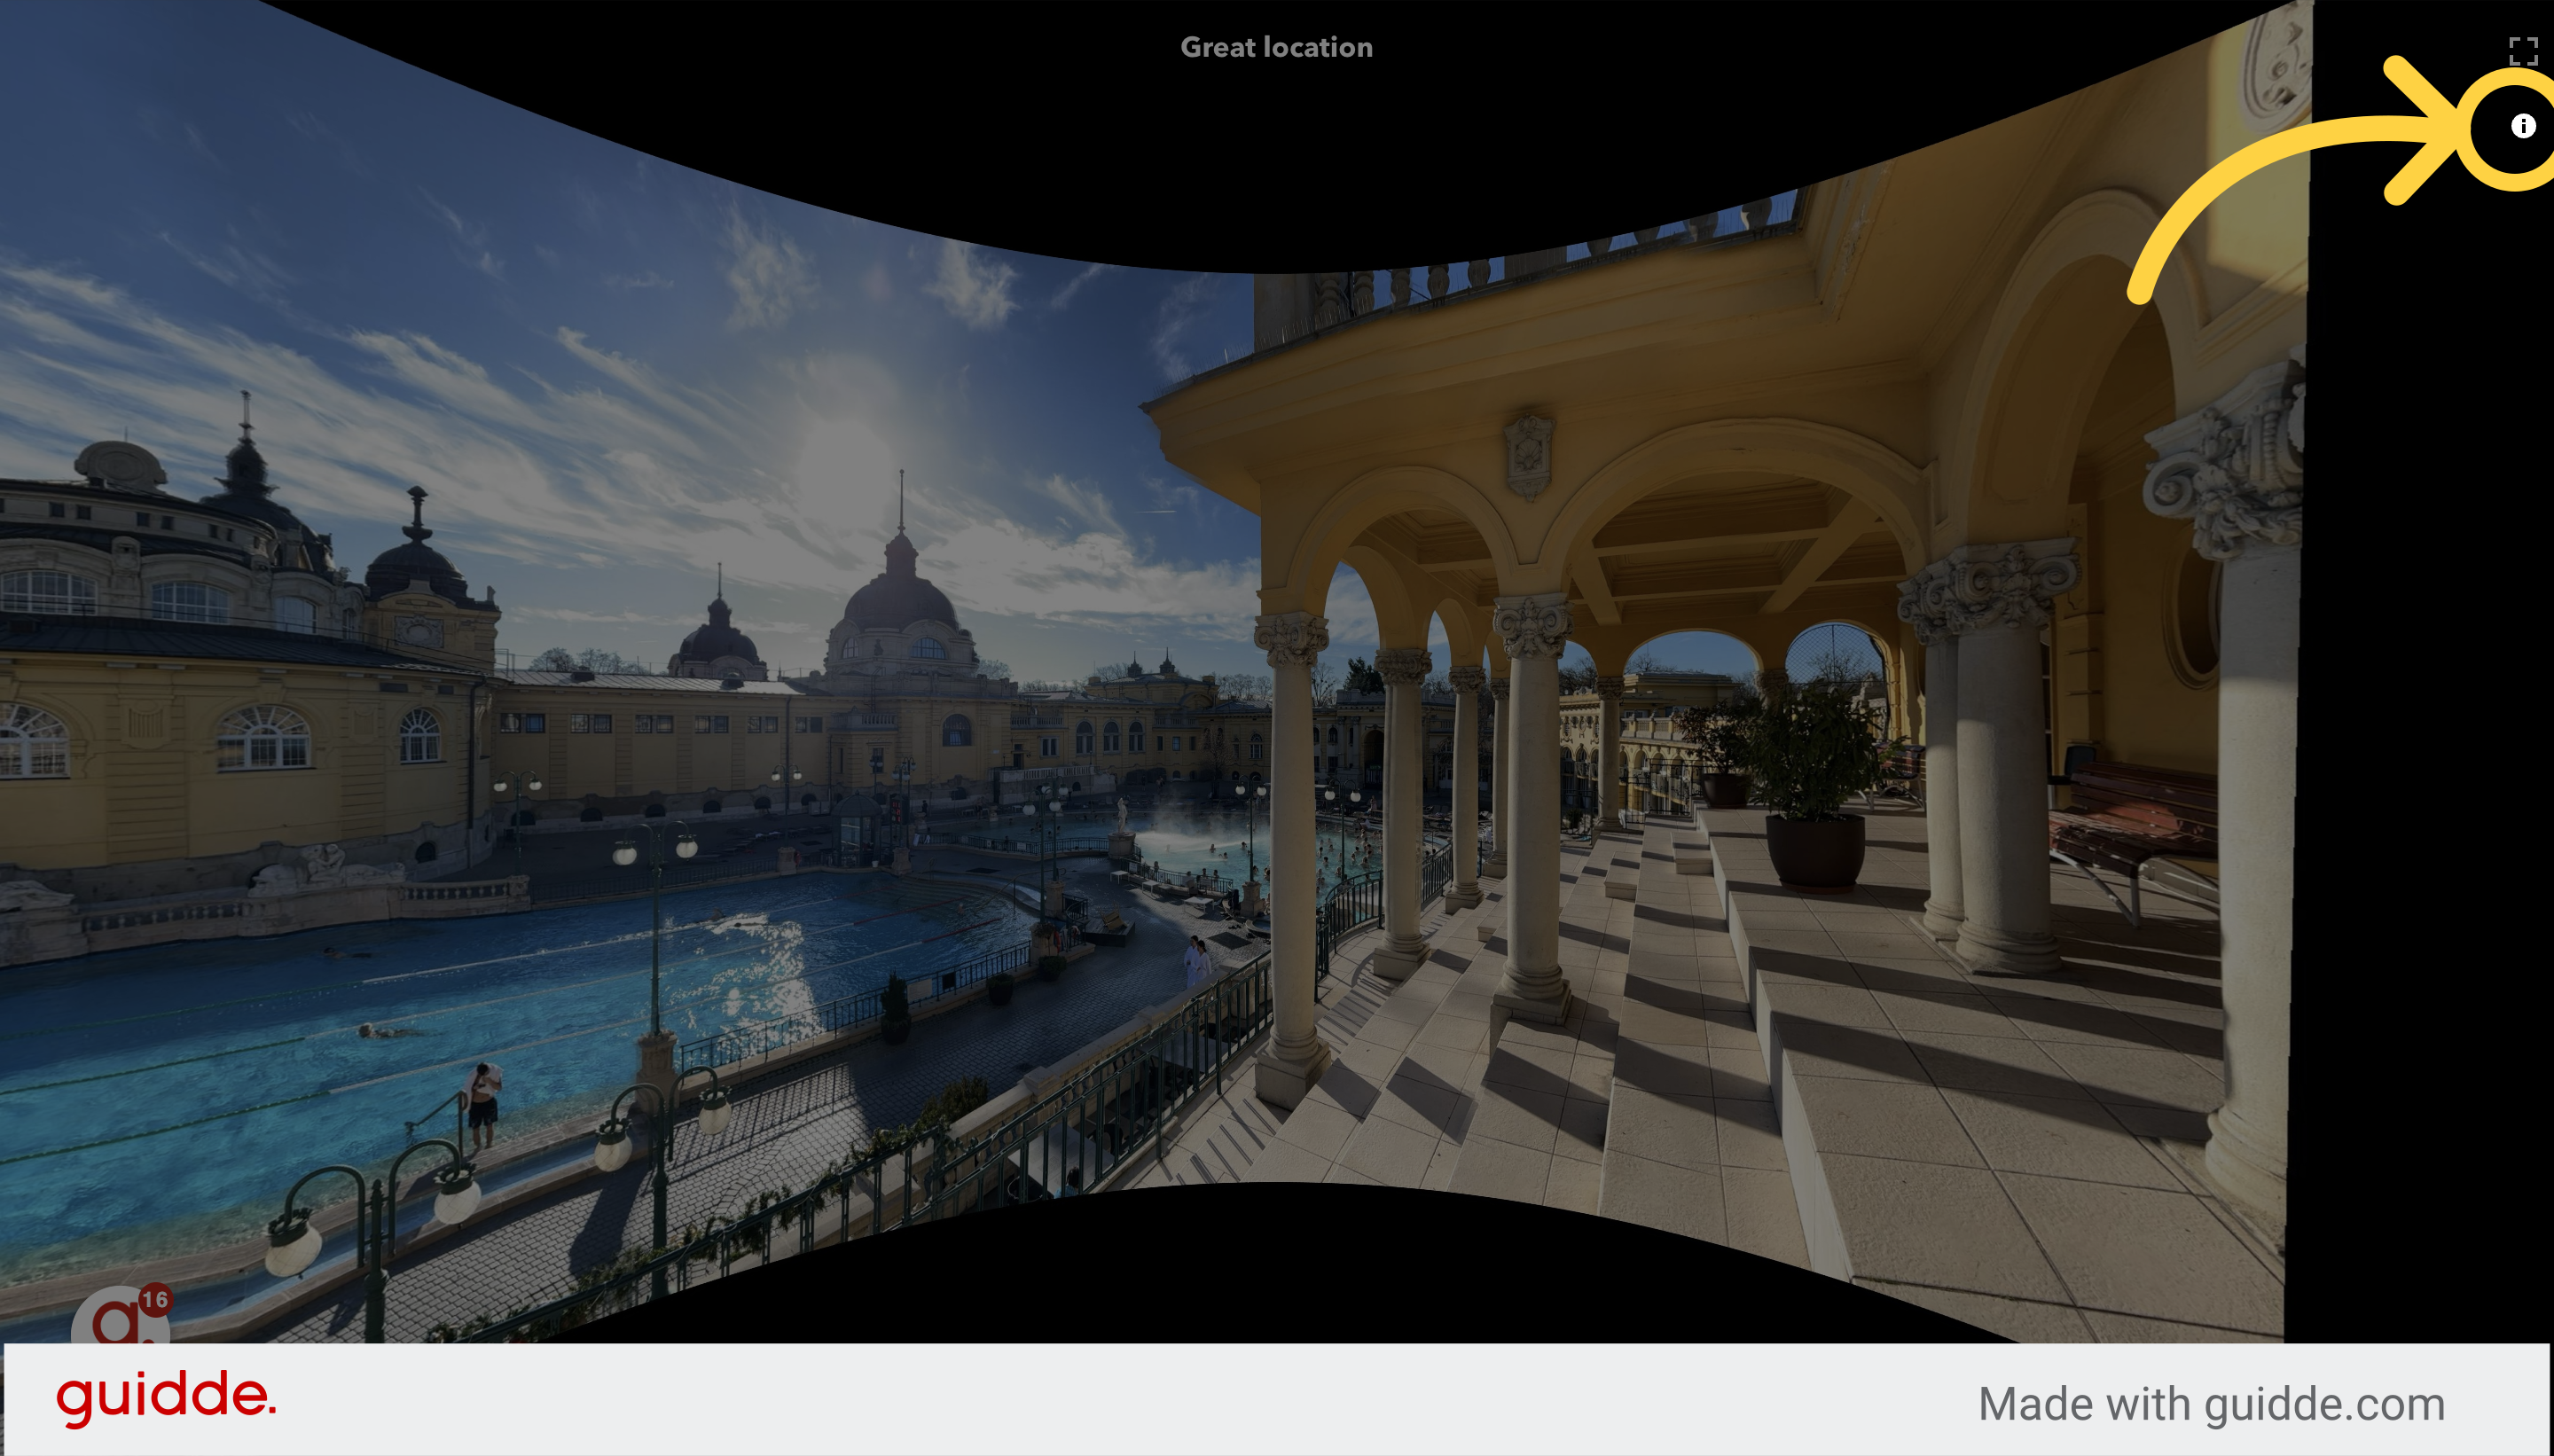
10. Click on the thumbnail of your pano to launch the pano viewer.

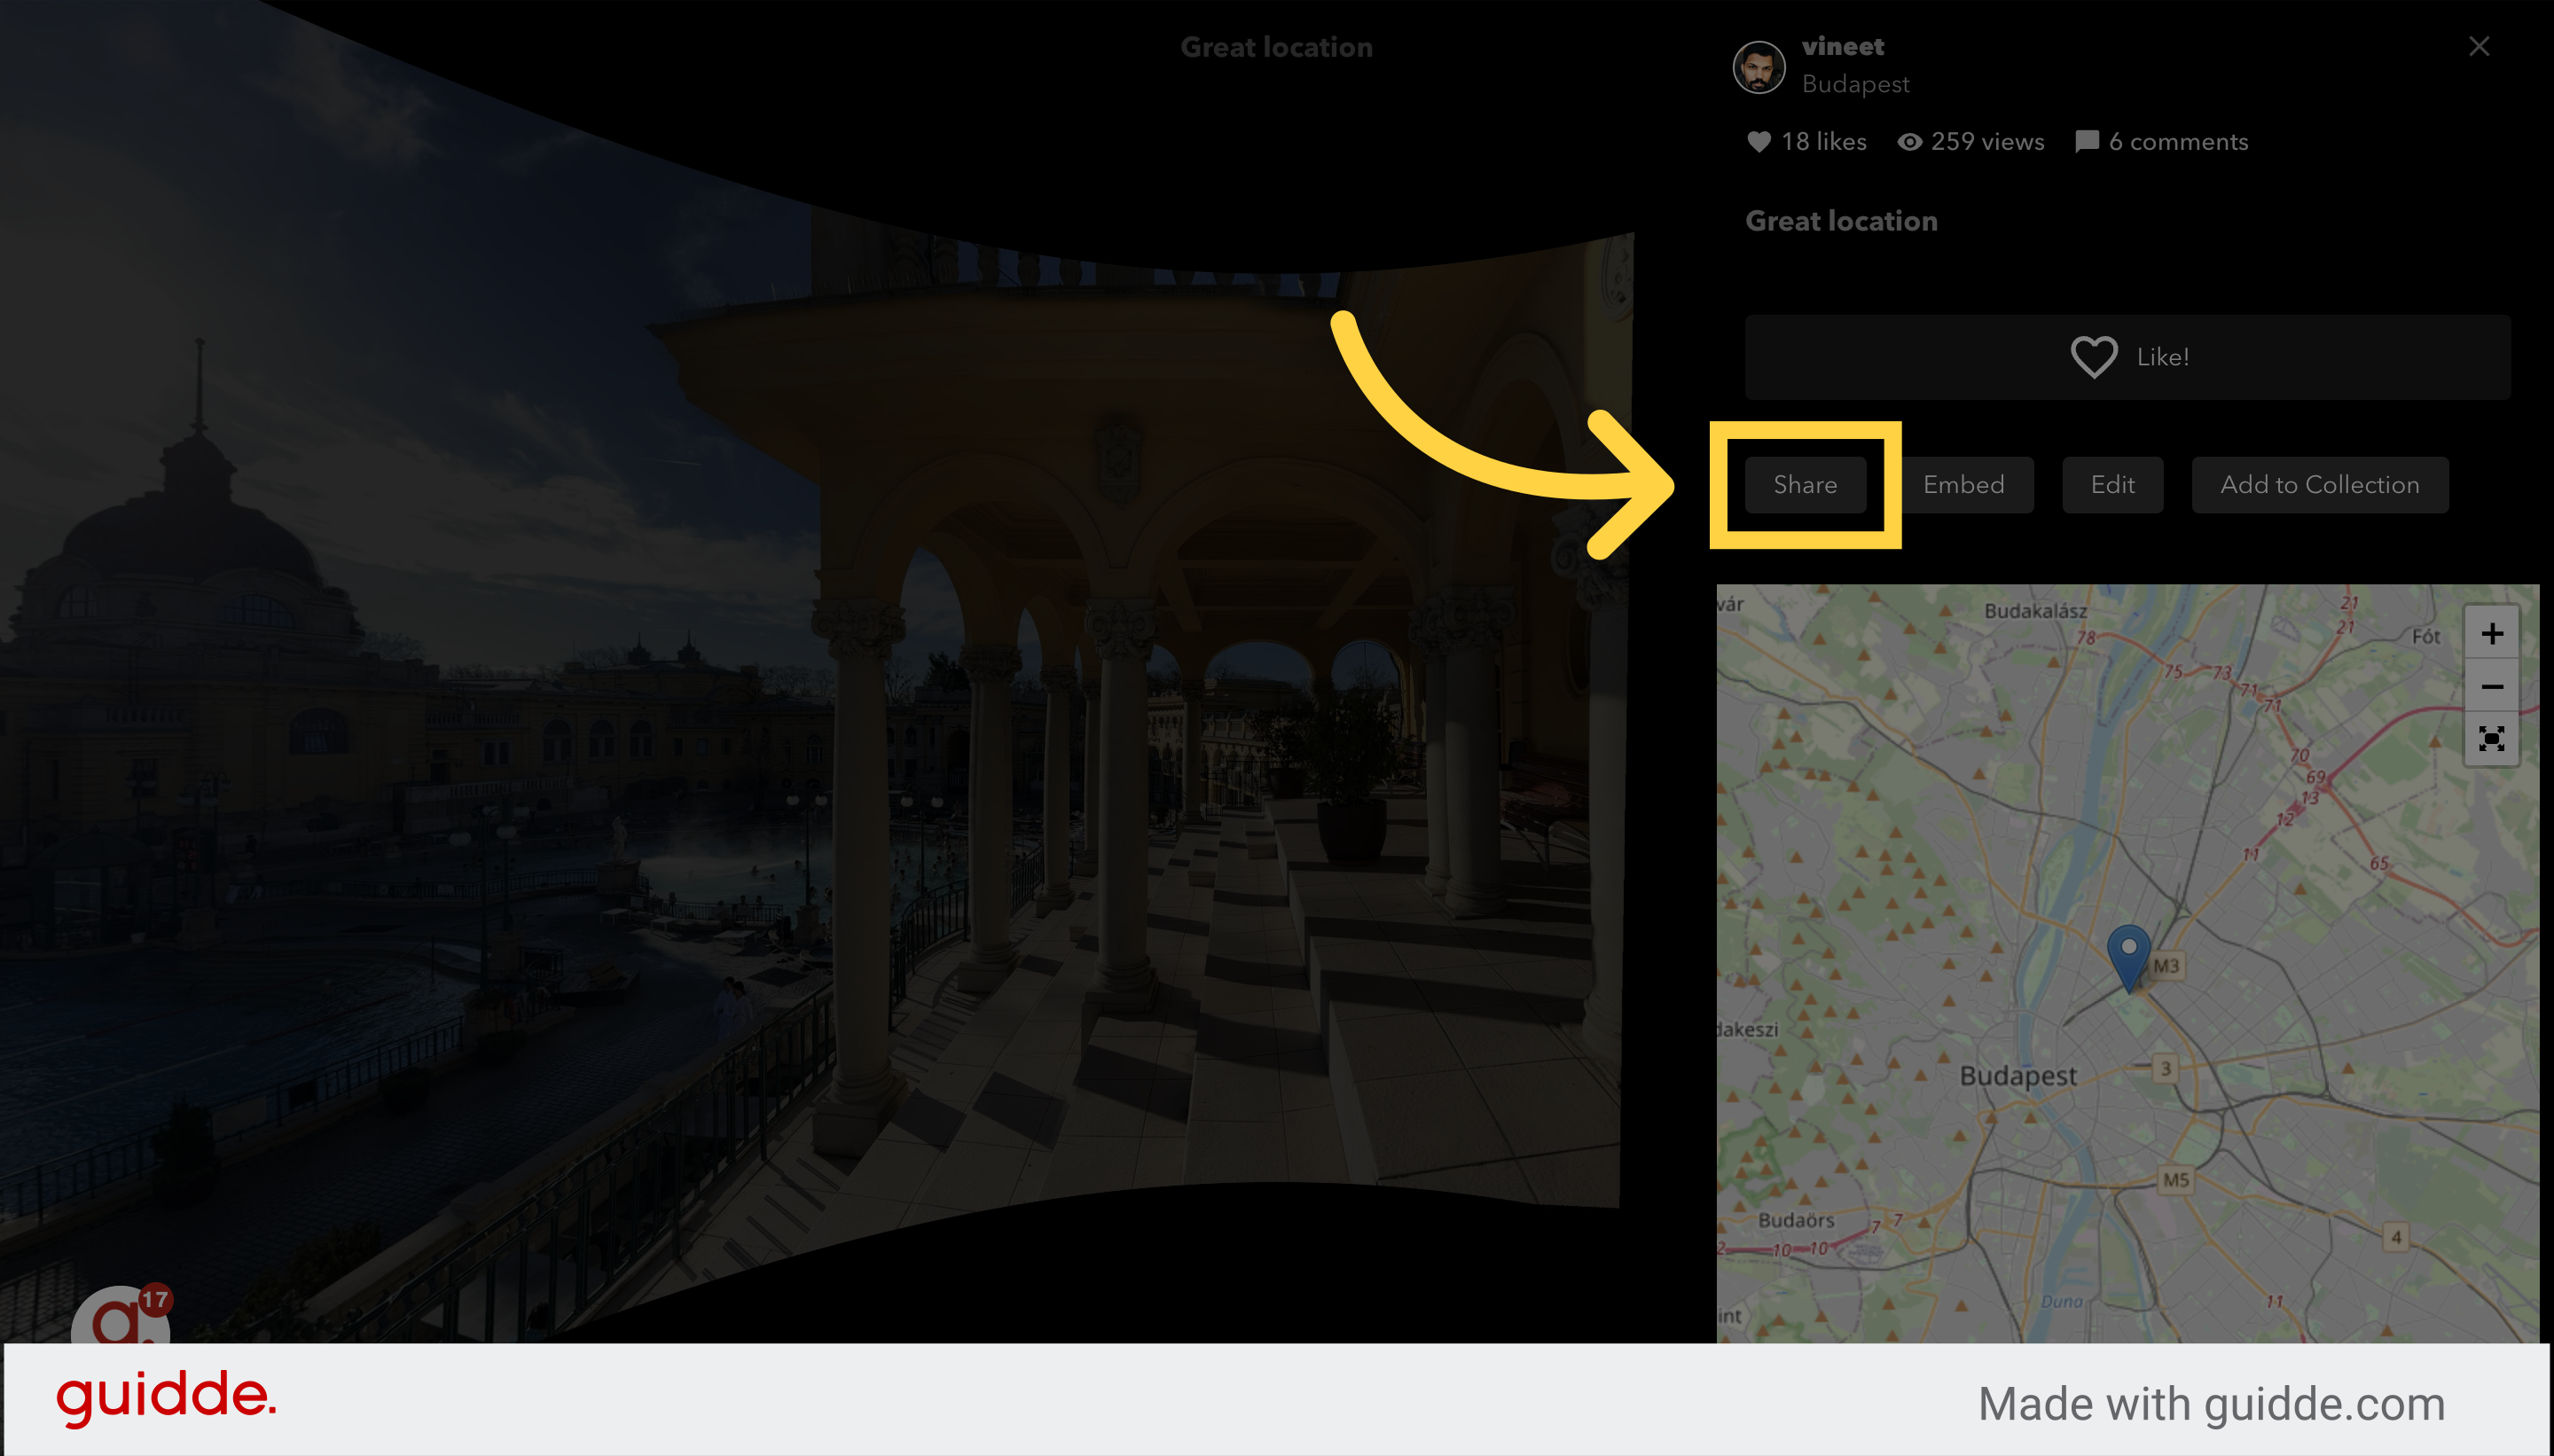
11. Click the icon below to see your share options.
12. You may choose "Share" or "Embed."
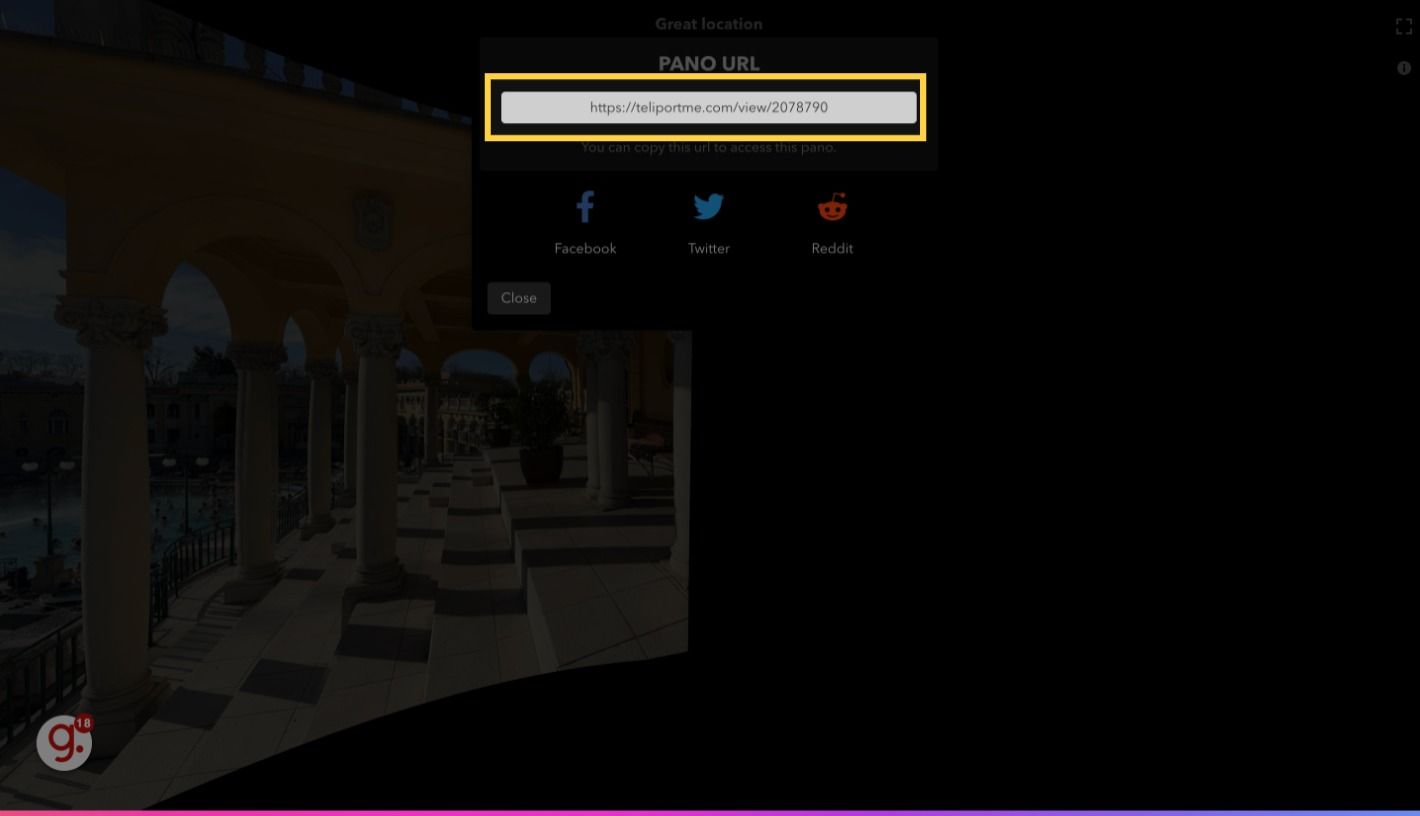
13. If you chose "Share," you will see your shareable URL.
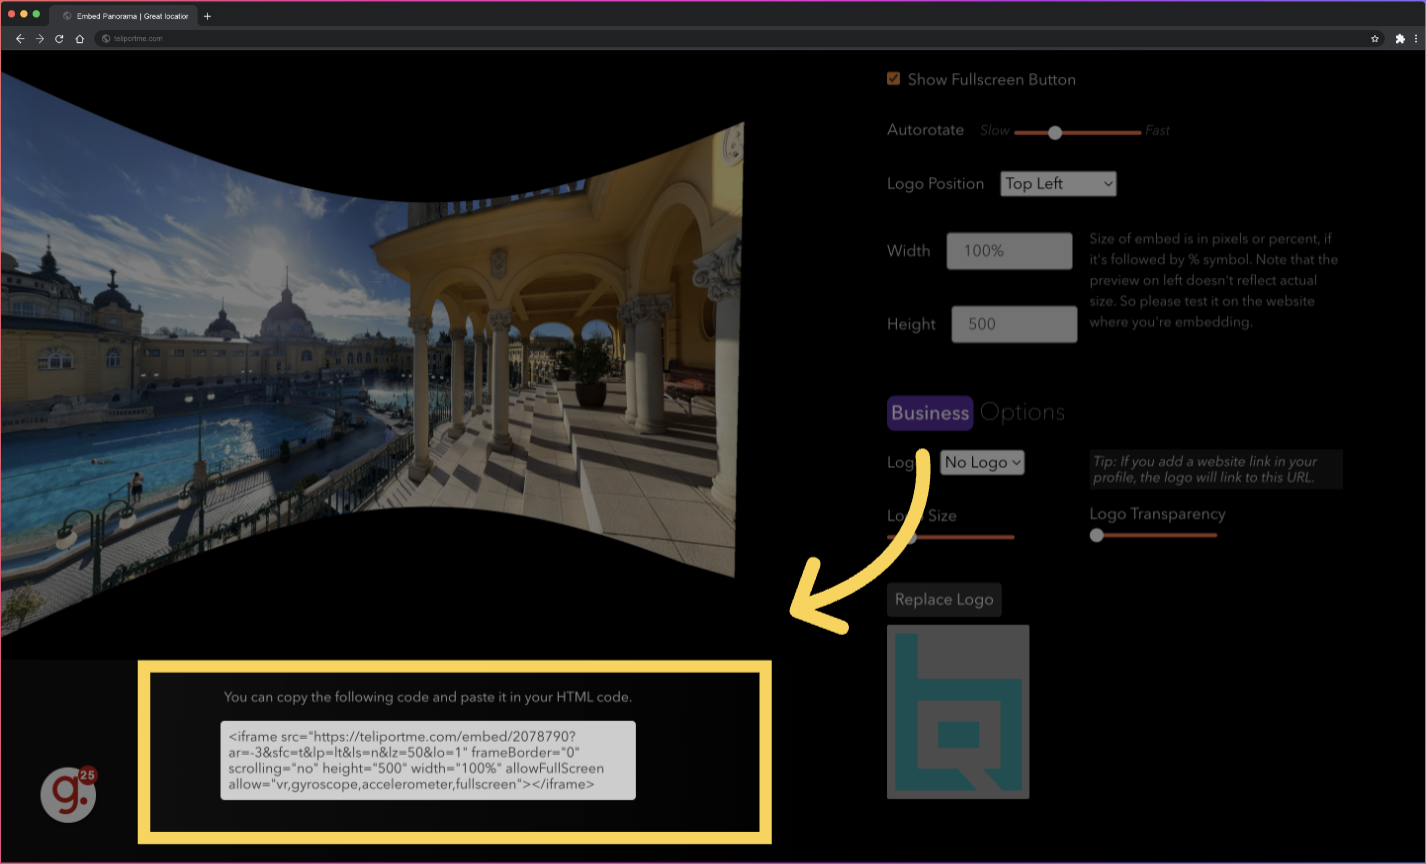
14. If you chose "Embed," you will see your embed code.


Branding Options:
Branding options are only available in the Essential Plan and Business Plan.
1. After you click "Embed," you will see your branding options. If you want to insert a custom logo, click "Custom."
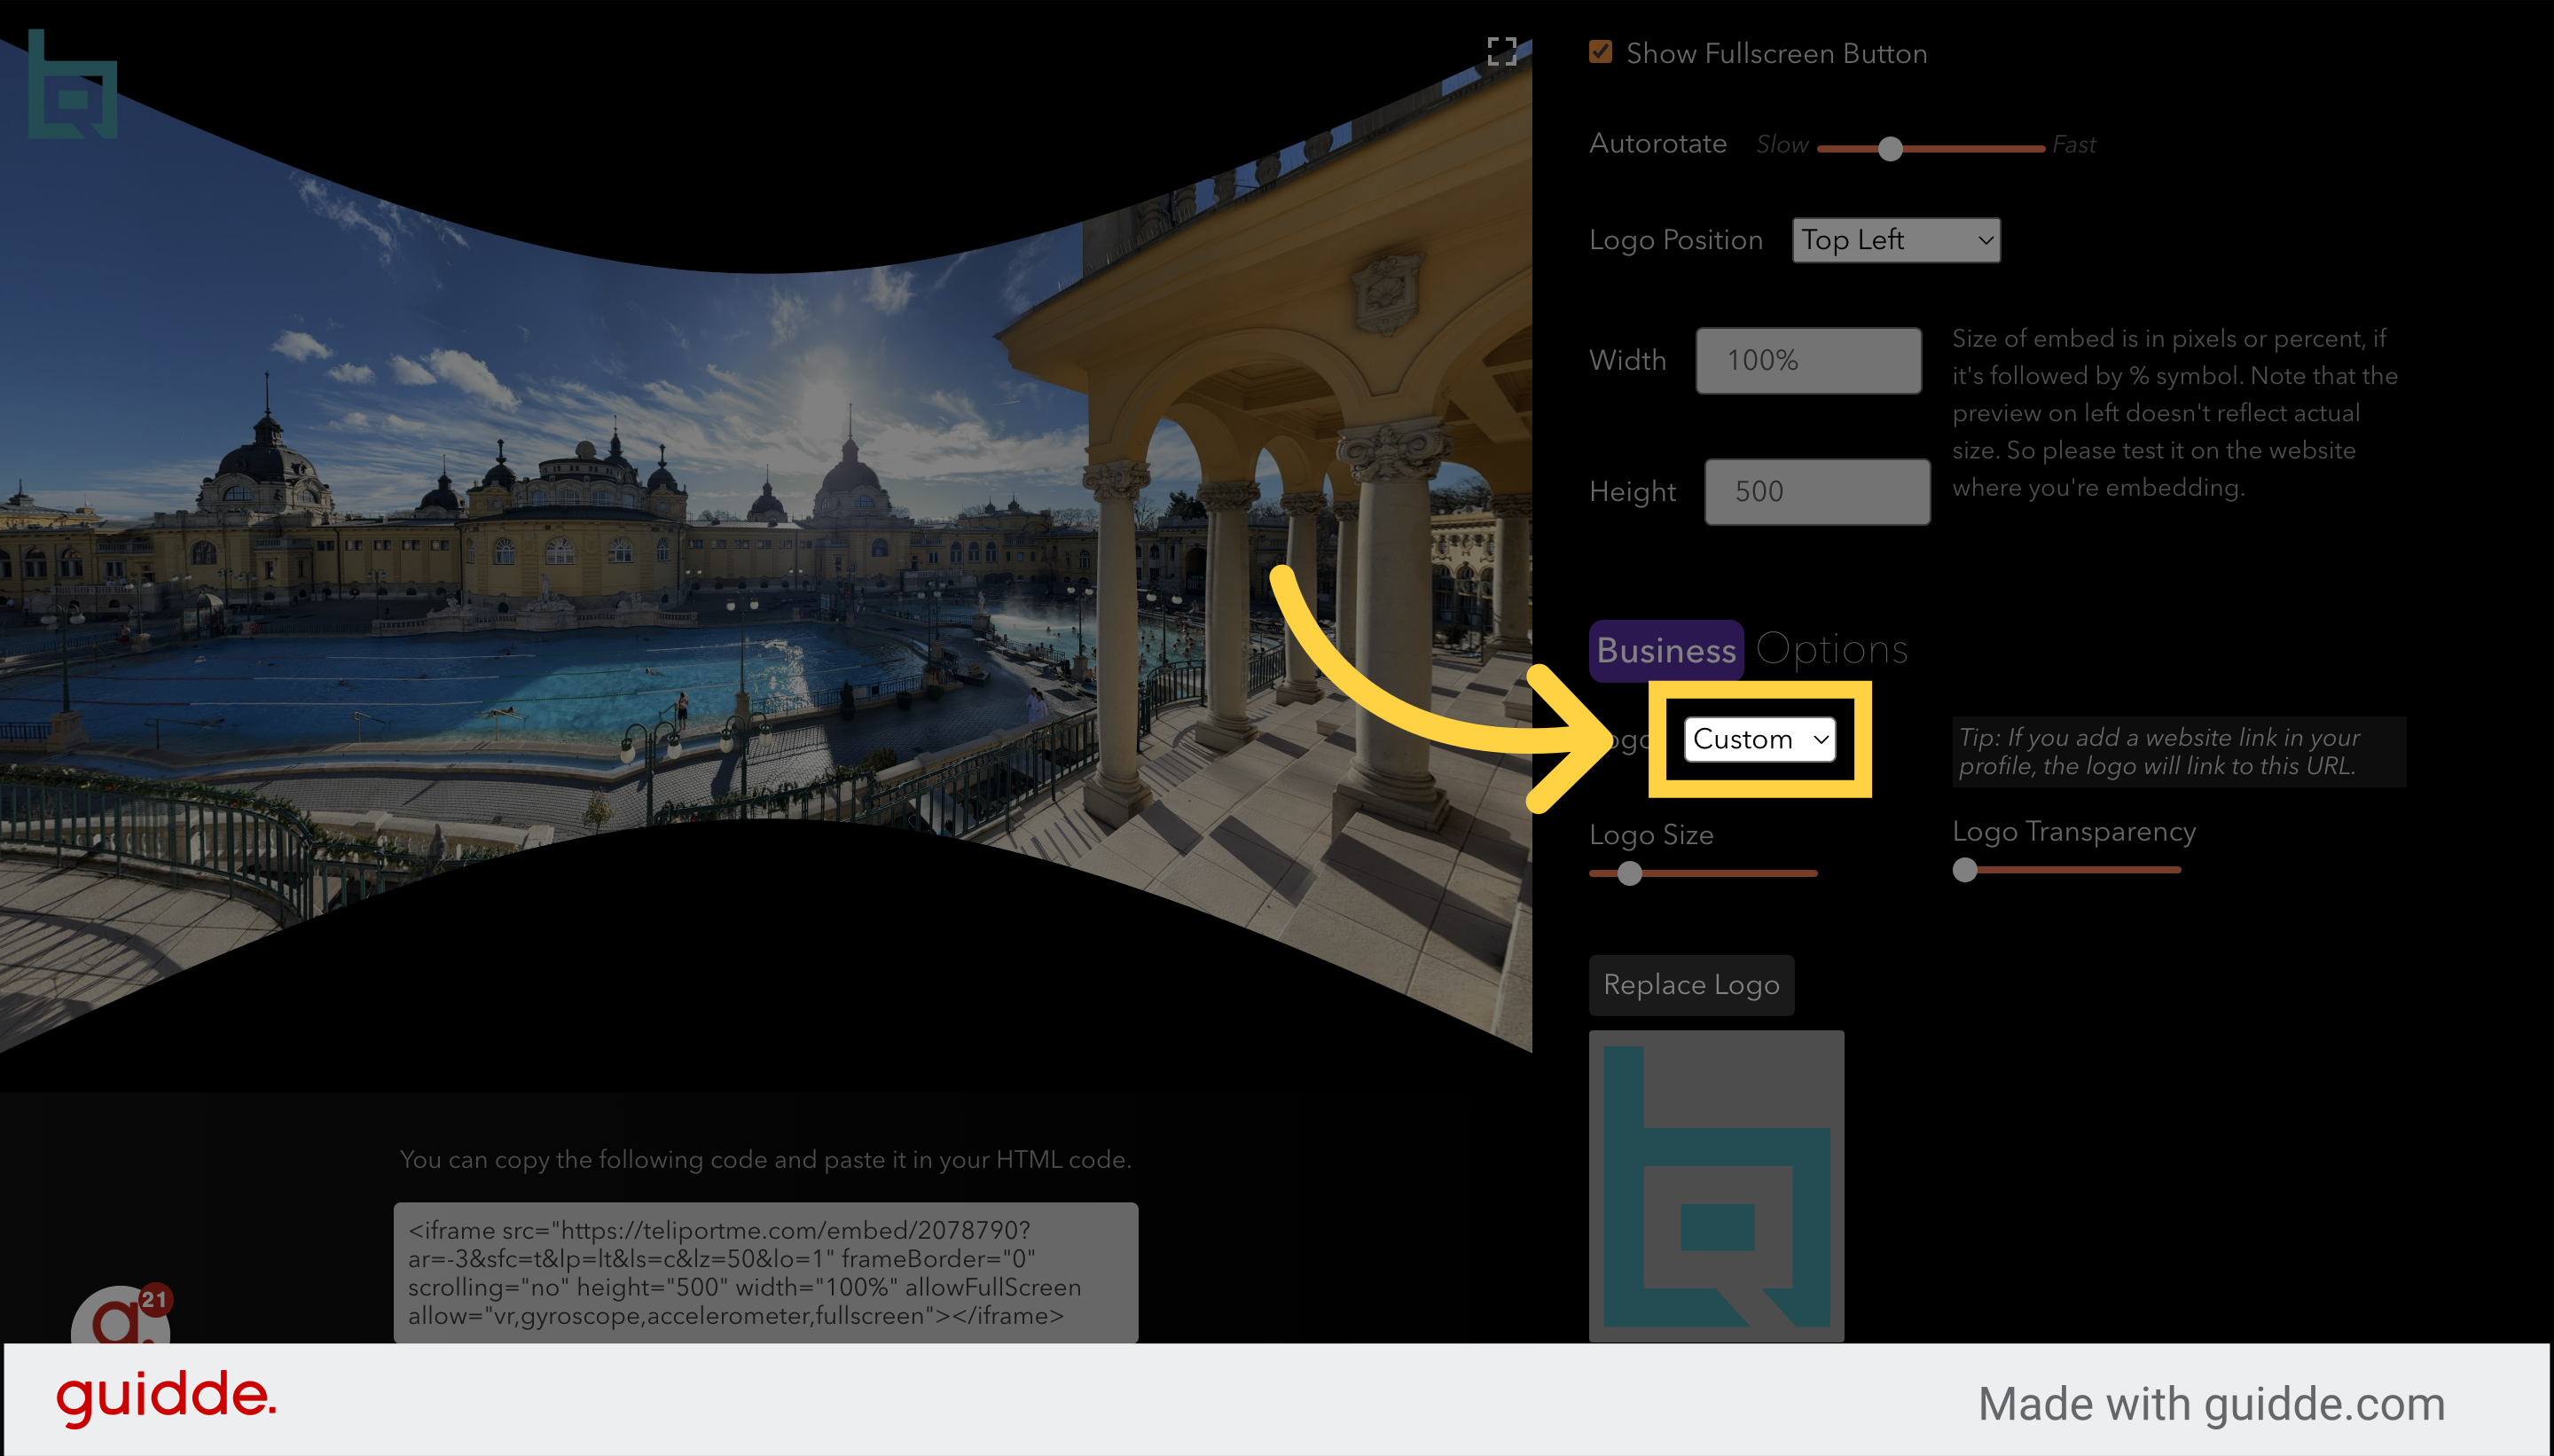
*Note that once you upload your first logo file, the option will change from "Custom" to "Replace Logo."
2. Choosing "No Logo" will remove all branding.
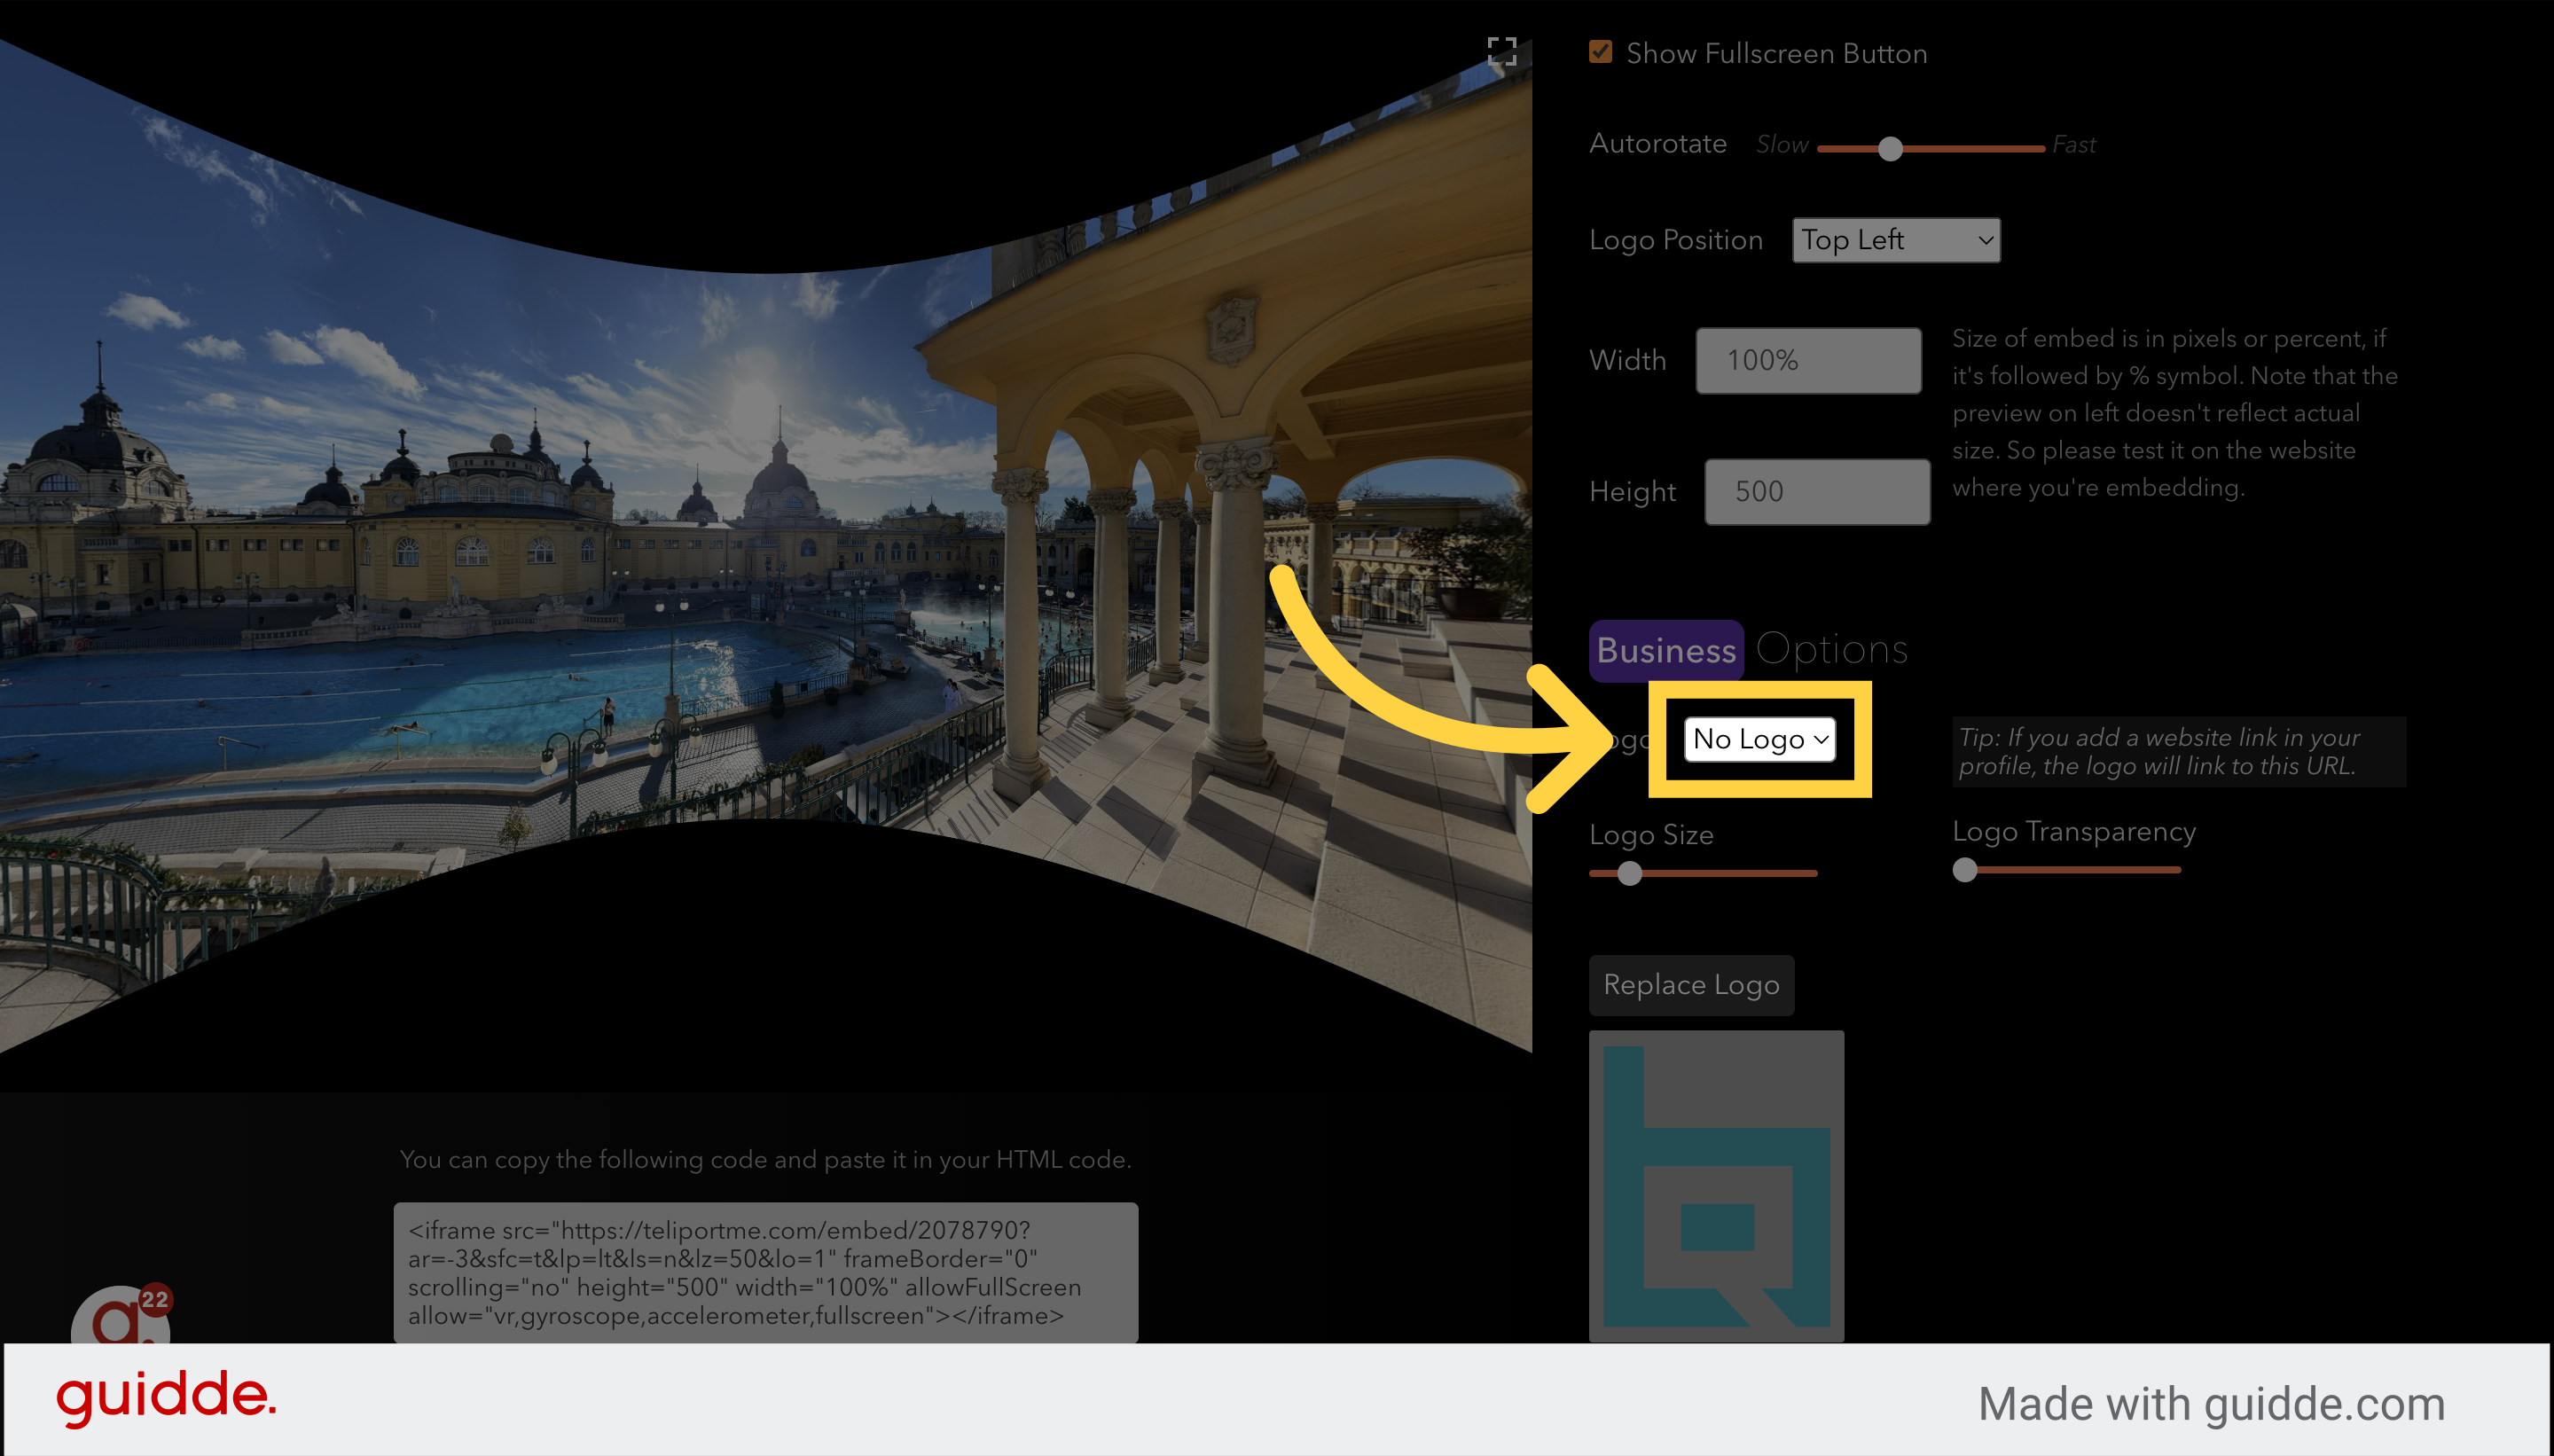
*Note that the default setting uses TeliportMe's branding.
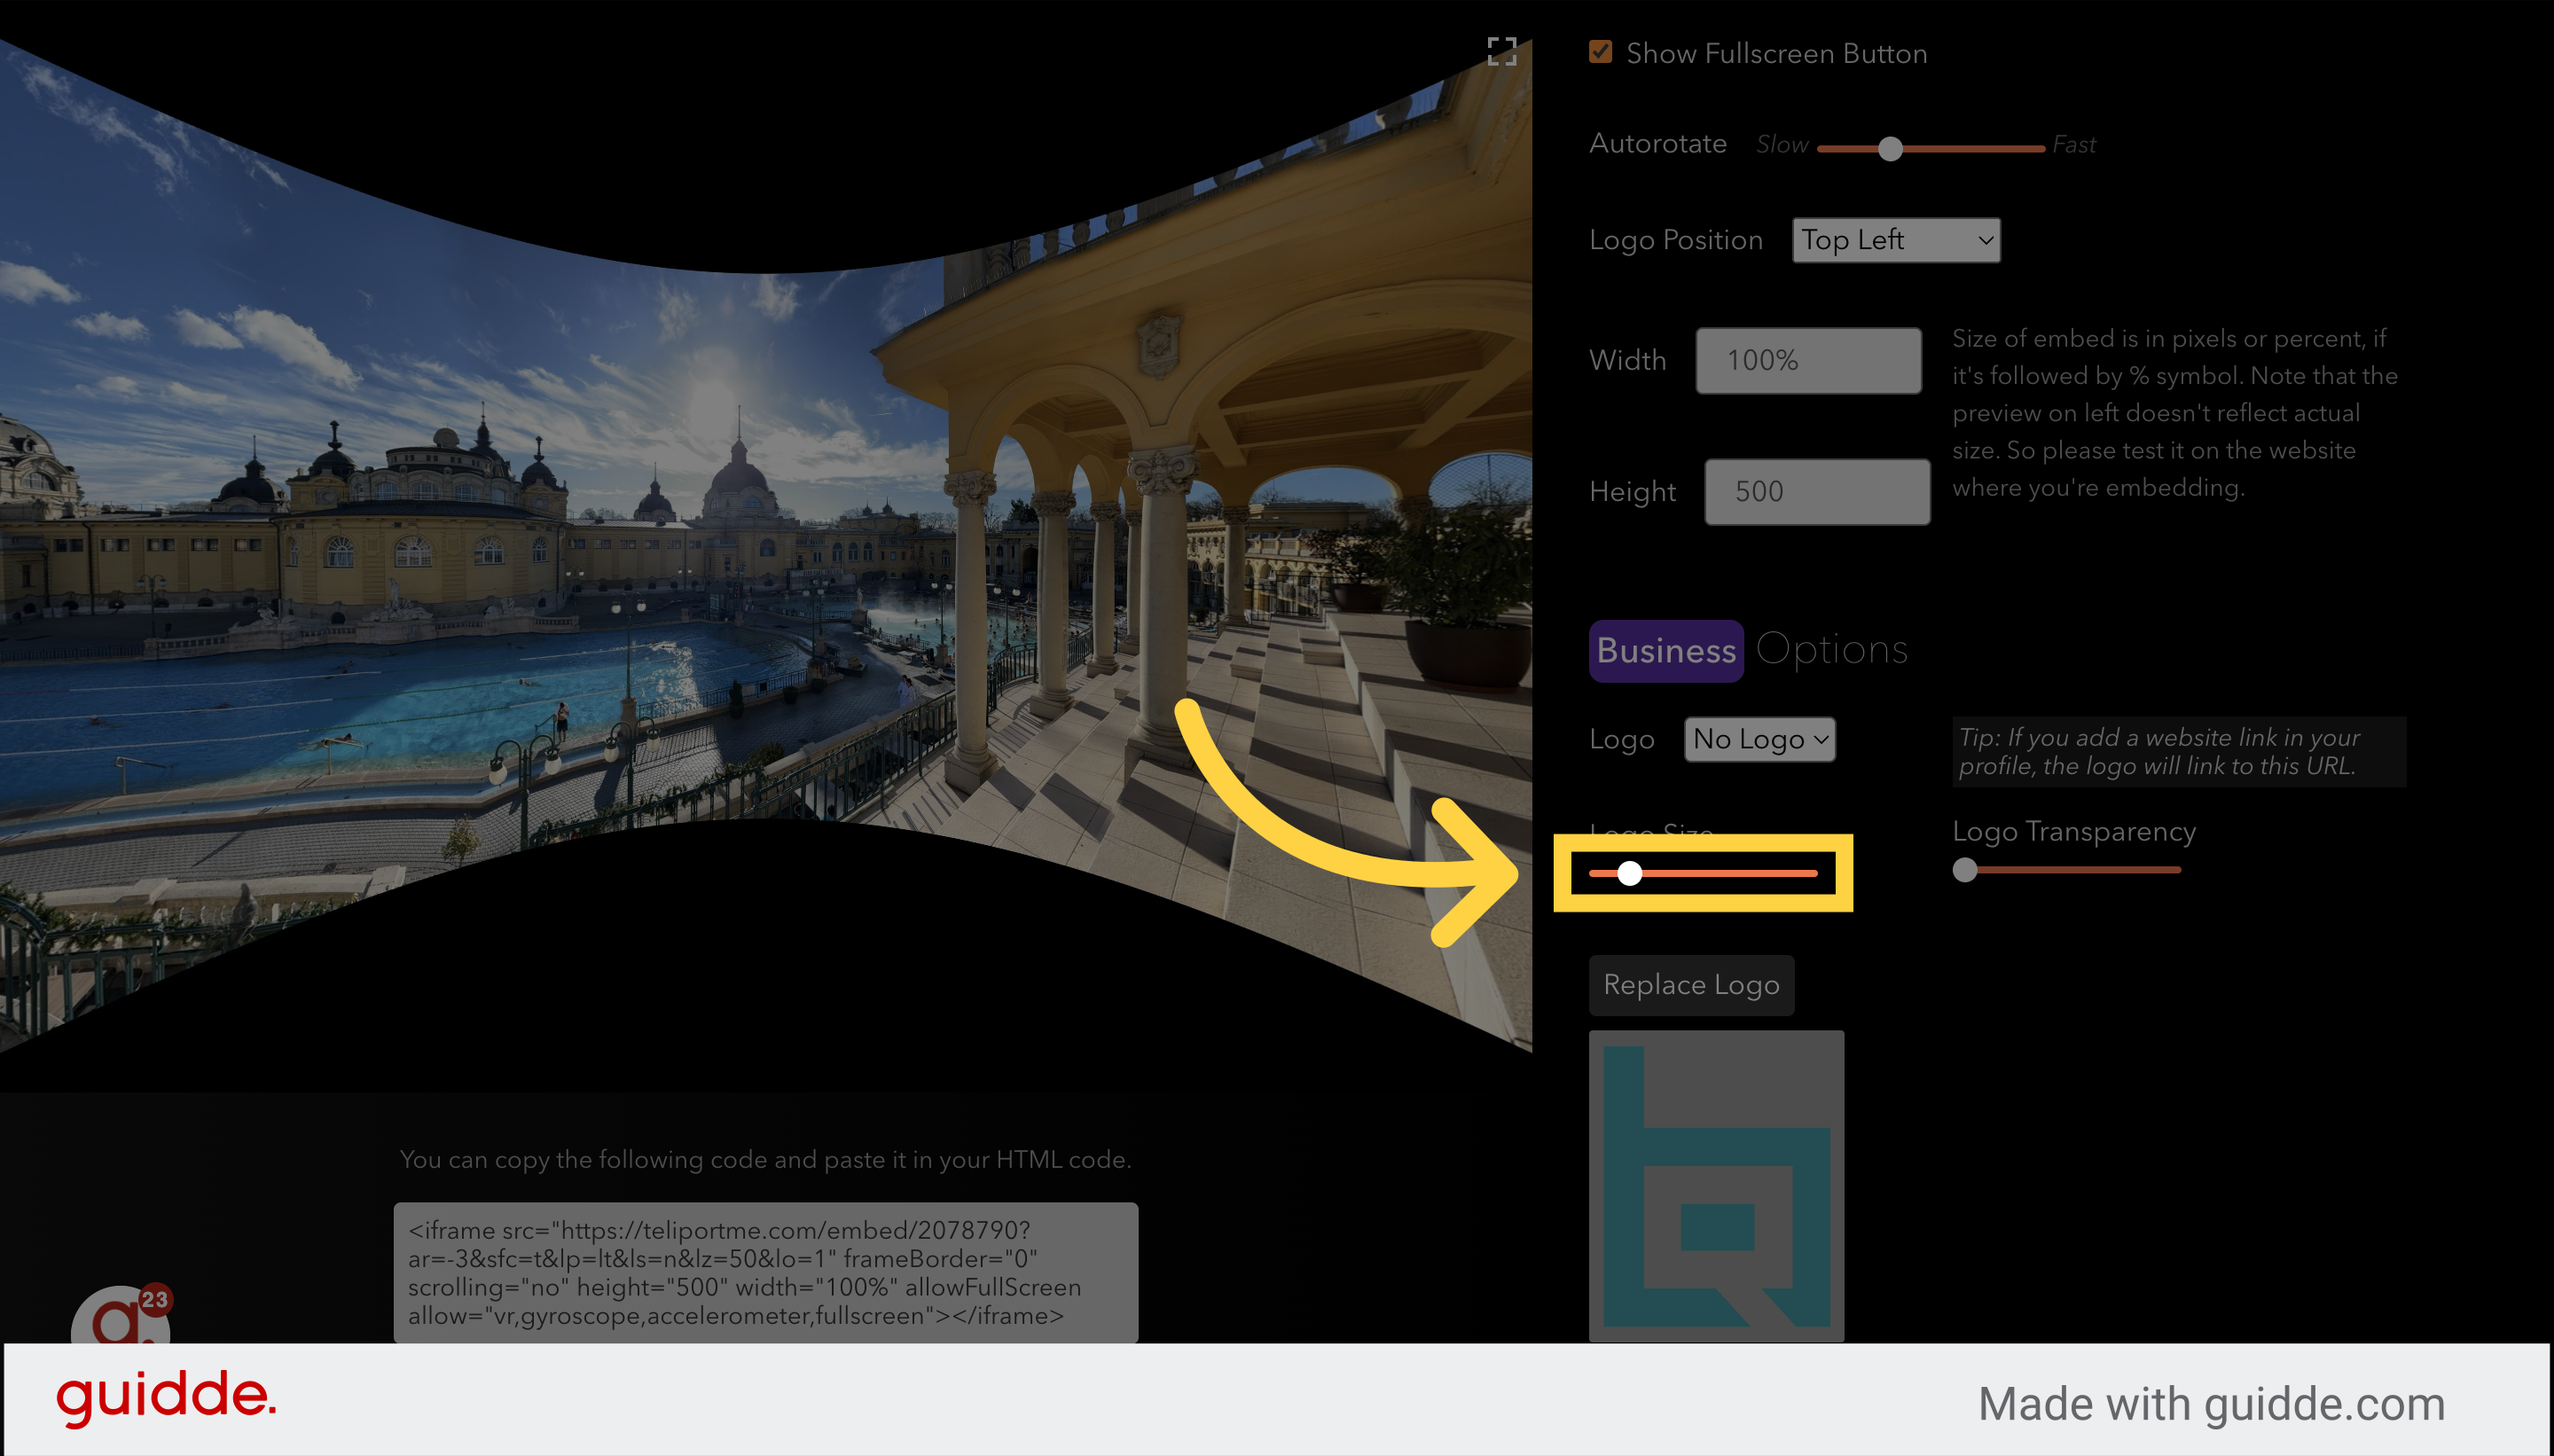
19. Adjust the sliders (see below) if you want to change the logo size and transparency.
In conclusion
With the knowledge and techniques gained from this tutorial, you now have the tools to showcase your panoramas to a wider audience. By leveraging the features discussed, you can make your photos shine and leave a lasting impression on viewers.